Block storage
Last updated: May 23, 2026
Block storage volumes are persistent disks you can attach to a virtual machine. Use them for website files, databases, media, backups, and any other data that needs to outlive a single VM. Volumes can be attached, detached, resized, and snapshotted from the portal.
Create a volume
- In the left navigation, under Storage, select Block storage.
- In the top right of the Block storage page, click + Create Volume.

- On the Create block storage page, fill in the Configuration section:
- Volume name — lowercase letters, numbers, and hyphens only (for example,
new-disk). - Region — the region the volume lives in. A volume can only be attached to a VM in the same region.
- Volume name — lowercase letters, numbers, and hyphens only (for example,
- In the Volume size section, use the slider to set the size (5 GB – 2,000 GB).
- Review the estimated monthly cost at the bottom, then click Create Volume.

The new volume appears in the Block storage list with status AVAILABLE.

Volume detail page
Click a volume in the list to open its detail page. The page shows two panels and three actions in the top right.

- Storage — size and region.
- Configuration — attached VM (or
Not attached), region, and creation time. - Attach — attach the volume to a VM in the same region.
- Resize — increase the volume's size.
- Delete — permanently destroy the volume.
Attach to a VM
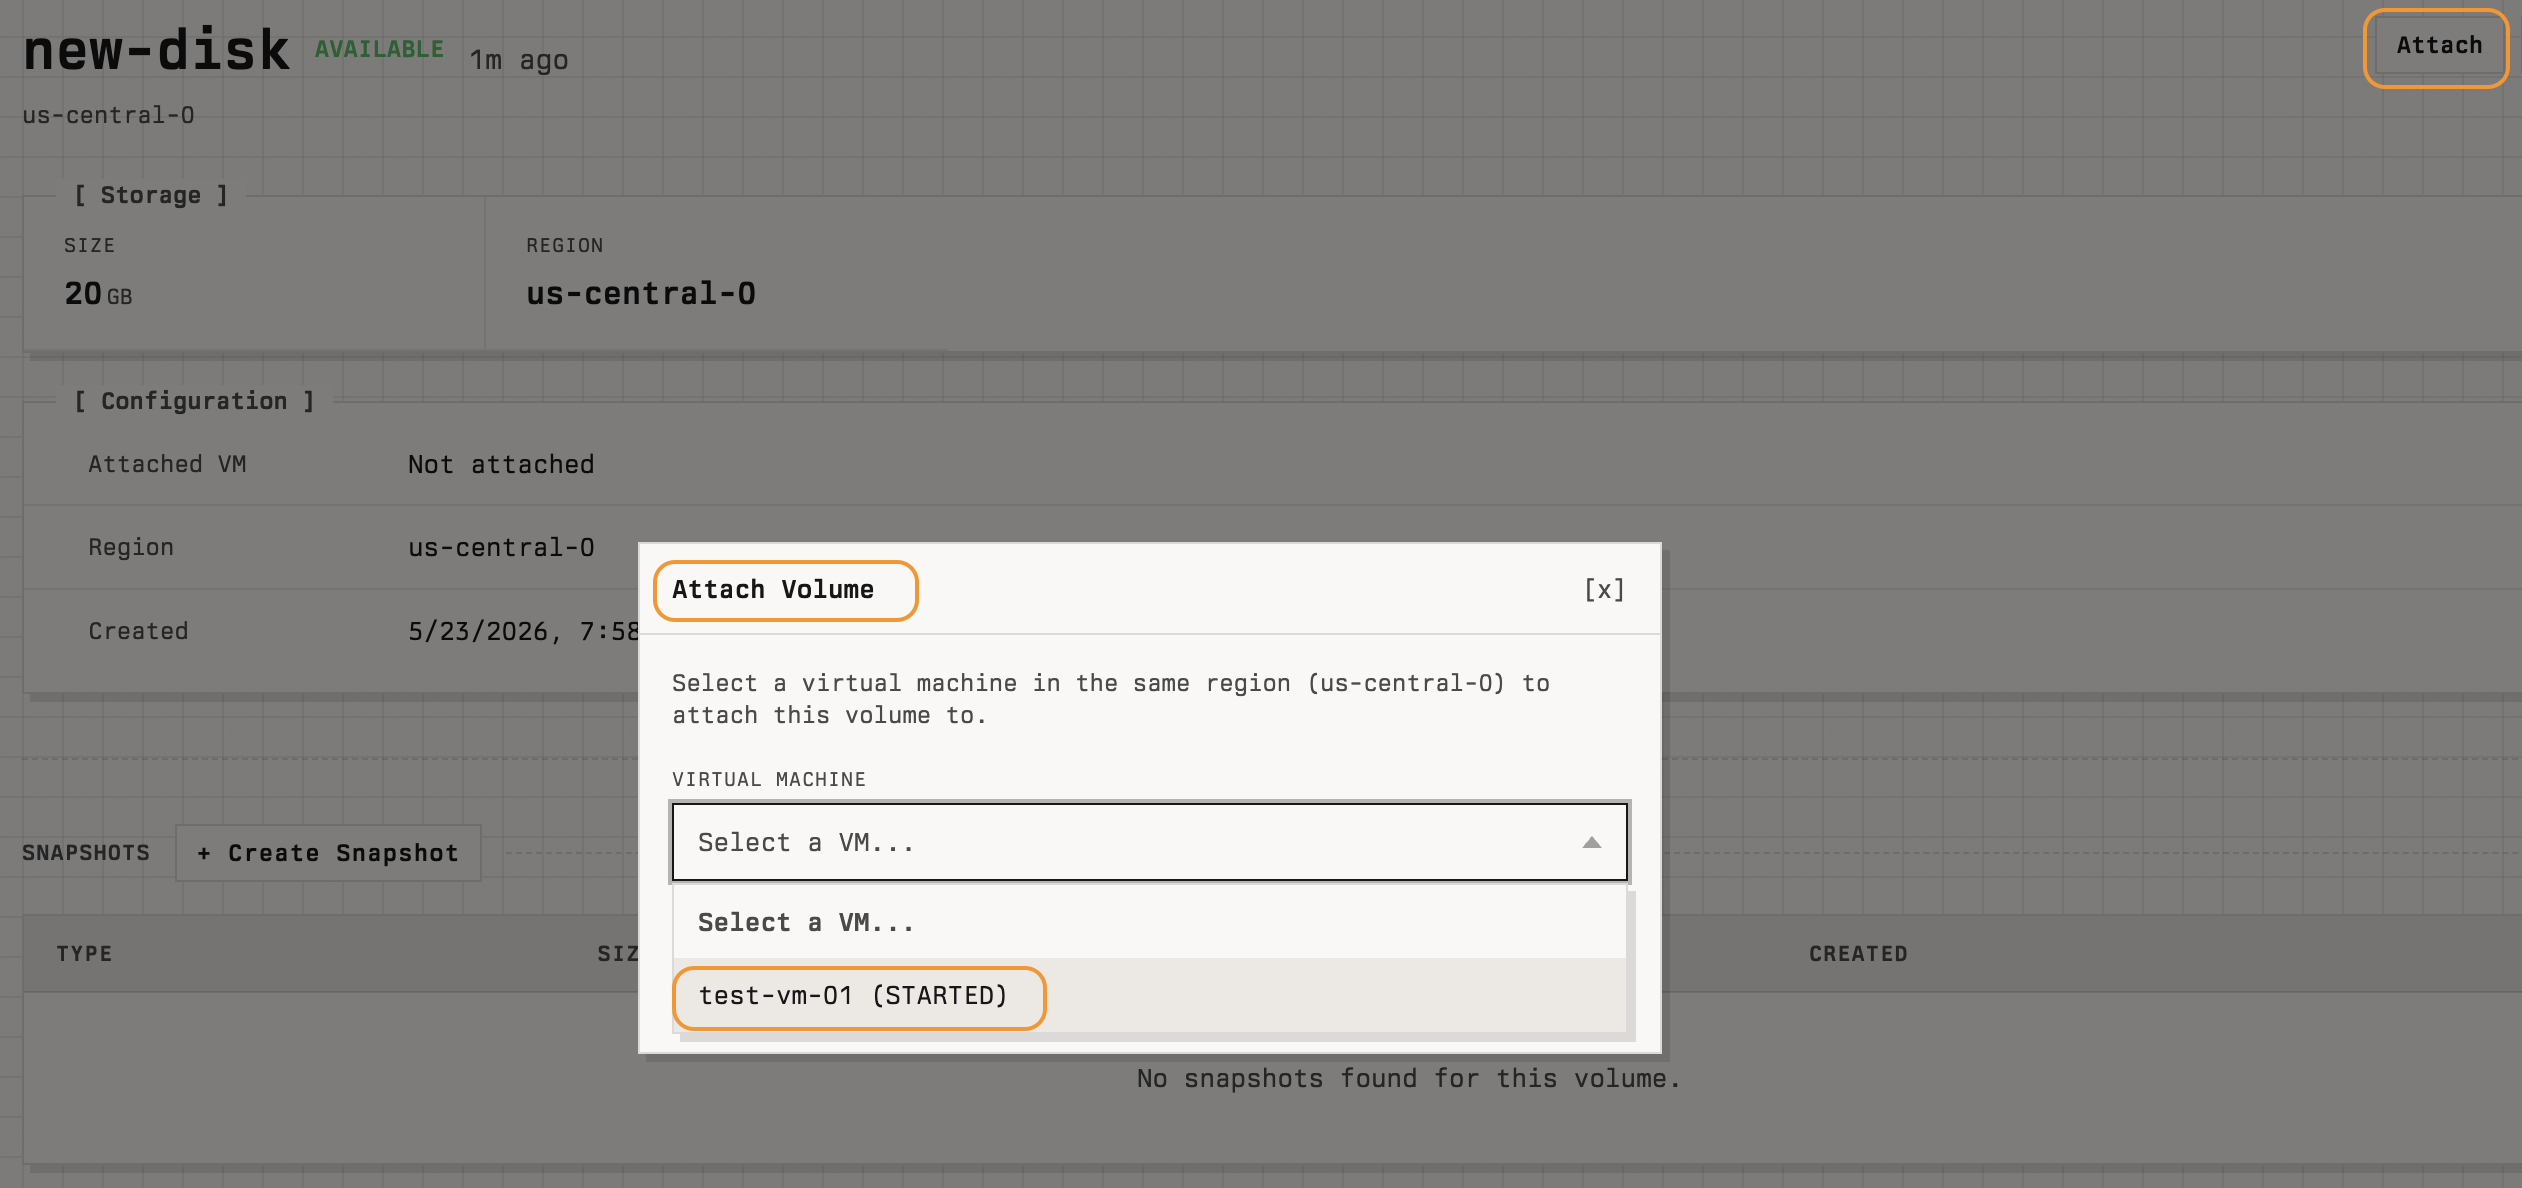
- On the volume detail page, click Attach in the top right.
- In the Attach Volume dialog, select a VM from the Virtual machine dropdown. Only VMs in the same region as the volume appear.
- Click Attach.
After the volume is attached, the Attached VM field on the Configuration panel shows the VM's name, and the Attached VM column on the list page is populated.
Once attached, log in to the VM and create a file system, mount the volume, and (optionally) add it to /etc/fstab so it mounts automatically at boot. The new device appears at a path such as /dev/sdb or /dev/vdb.
Detach from a VM
To detach, open the volume's detail page and click Detach in the top right (this button replaces Attach when the volume is in use). Unmount the volume on the VM before detaching to avoid data loss.
Resize a volume
- Open the volume's detail page and click Resize in the top right.
- Choose the new size (must be larger than the current size; volumes cannot be shrunk).
- Confirm.
You may need to resize the file system inside the VM after the volume is grown.
Snapshot a volume
The volume detail page has a Snapshots section with a + Create Snapshot button. A snapshot is a point-in-time copy of the volume that you can use to restore data or create a new volume.
For more on snapshots, see Snapshots.
Delete a volume
On the volume's detail page, click Delete in the top right. Detach the volume from any VM first.
Note: Deleting a volume permanently destroys all of its data. The action cannot be undone.