Jitsi Meet
Last updated: February 10, 2026
1. Set up your Jitsi Meet installation
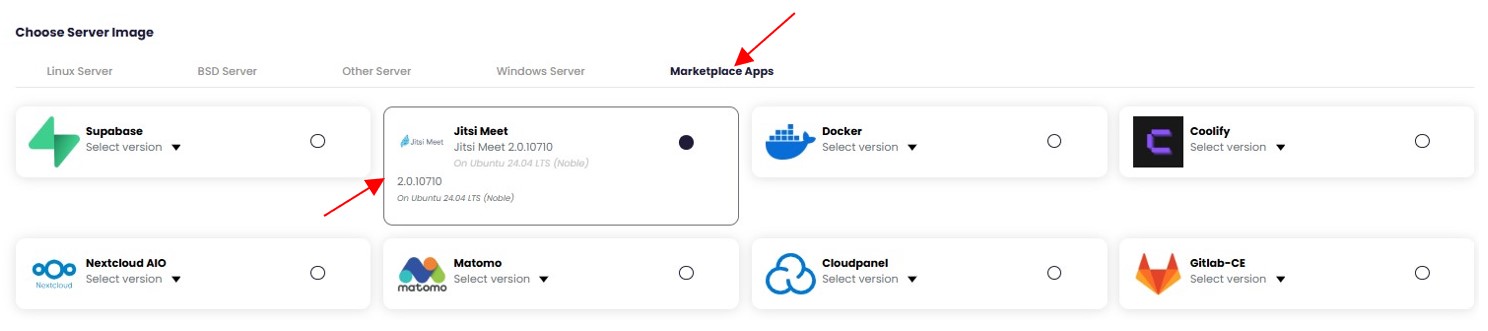
After choosing your Zone, Network, click on the Marketplace Apps tab, select Jitsi Meet and pick your desired version.
A section for Environment Variables will be displayed. Fill in the following information.

Your Email
- This is the email address that will receive any LetsEncrypt certificate alerts.
Your Domain
- This is the domain you want to use for your Jitsi Meet instance, we will configure the A records later since we don't know what the public IP will be just yet.
- Note: Only input your subdomain or root domain. Do not include "https" or "www". Just "my-subdomain.rootdomain.com"
2. Initialize your Jitsi Meet
After setting your environment variables, choose a server size and then click on "Add a new startup script". This will apply the environment variables you set earlier, so no further action is needed.

Click "Add startup script" to confirm.
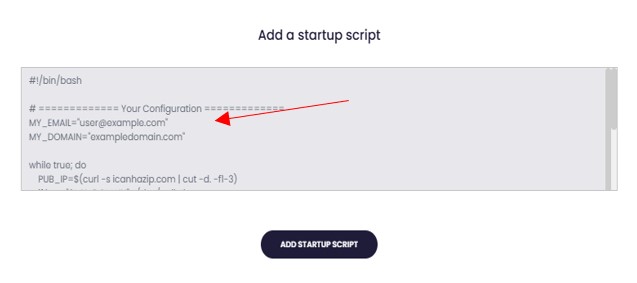
Verify that the values for {Your Email} and {Your Domain} are correctly entered in the Add New Startup Script configuration.
(Optional) Apply any ssh keys you wish to use, and name your instance. Review, and deploy.
3. Configure DNS
After your server has been created, note the public IP address on the instance overview page, then navigate to your DNS provider for your_domain and create A records for your domain.
Create one mapping for your domain/subdomain, and one prefixed with "www.", as seen in the example below. (use your VM's public IP as the value instead of 0.0.0.0)
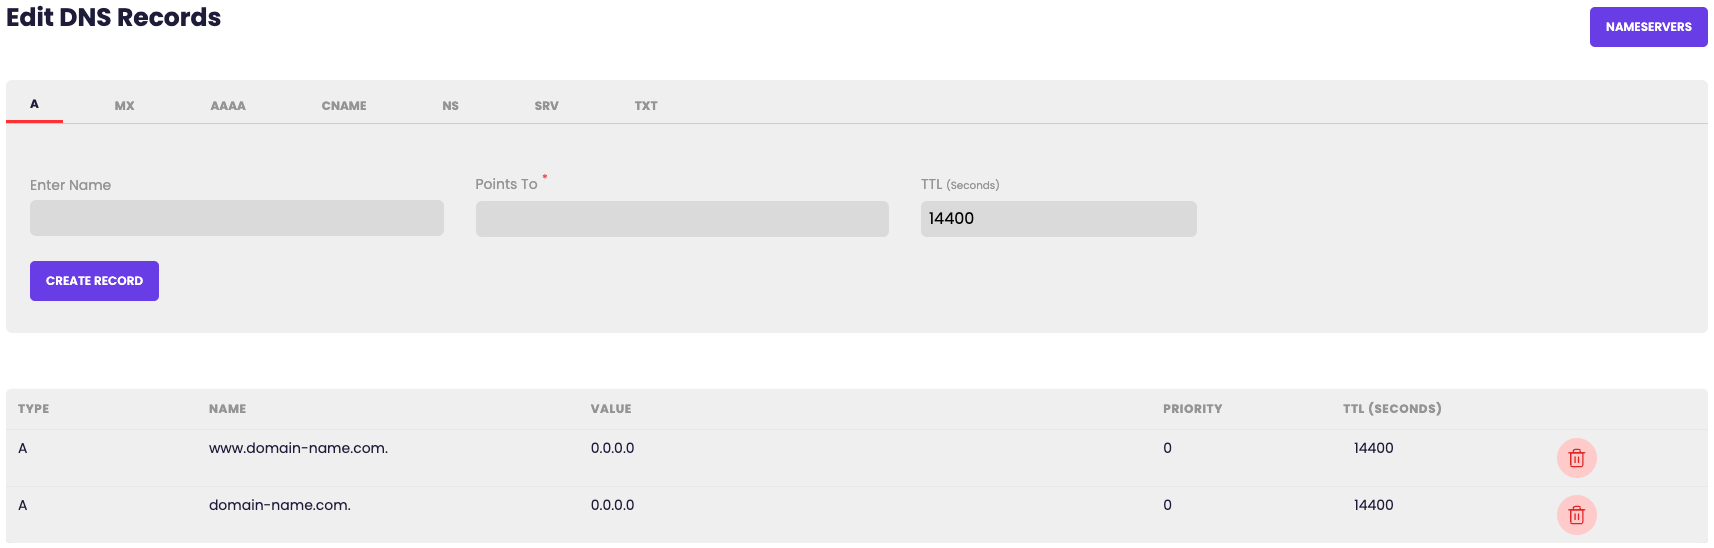
- Note: DNS providers have different methods of doing this, please contact your DNS provider if you are having any issues
4. Verify Jitsi deployment
SSH into the server using the Username, Public IP Address, and Password provided during instance creation. After logging into the Virtual Machine, run the following command tail -f /var/log/cloud-init-output.log to monitor the installation status and confirm when DNS validation and installation are completed

If the output displays "Jitsi stack started", it confirms that the deployment completed successfully and DNS is configured correctly.
5. Config user
To add authentication/admin user(s), please run the following command and add the <USER> and <PASSWORD>

6. Check your site
Access the Jitsi web console using {Your Domain} configured during deployment. Users can create meeting rooms after accessing the site. Administrator privileges may require a one-time authentication using the configured <USER> and <PASSWORD> credentials.
Troubleshooting
If your Jitsi Meet installation is having issues, you can inspect the logs by connecting to the system with ssh and using docker-compose.
# View logs for all containers
cd ~/docker-jitsi-meet-stable-10710 && docker compose -p jitsi-meet logs -f

# Optional: View logs for specific containers
docker compose -p jitsi-meet logs -f web
docker compose -p jitsi-meet logs -f jicofo
docker compose -p jitsi-meet logs -f jvb
docker compose -p jitsi-meet logs -f prosody
If you are having trouble with your domain, or certificates/ssl, try restarting the proxy service.
cd ~/docker-jitsi-meet-stable-10710 && docker compose -p jitsi-meet restart web