WordPress hosting
Last updated: May 26, 2026
American Cloud's managed WordPress hosting handles provisioning, performance, security, and backups so you can focus on your site. Sites run with Redis object caching, AccelerateWP, SSL/TLS by default, automated backups, staging and cloning, and proactive monitoring.
This article covers the full lifecycle: creating a site, attaching a custom domain, managing your instance, changing plans, and adding more sites.
Create a WordPress instance
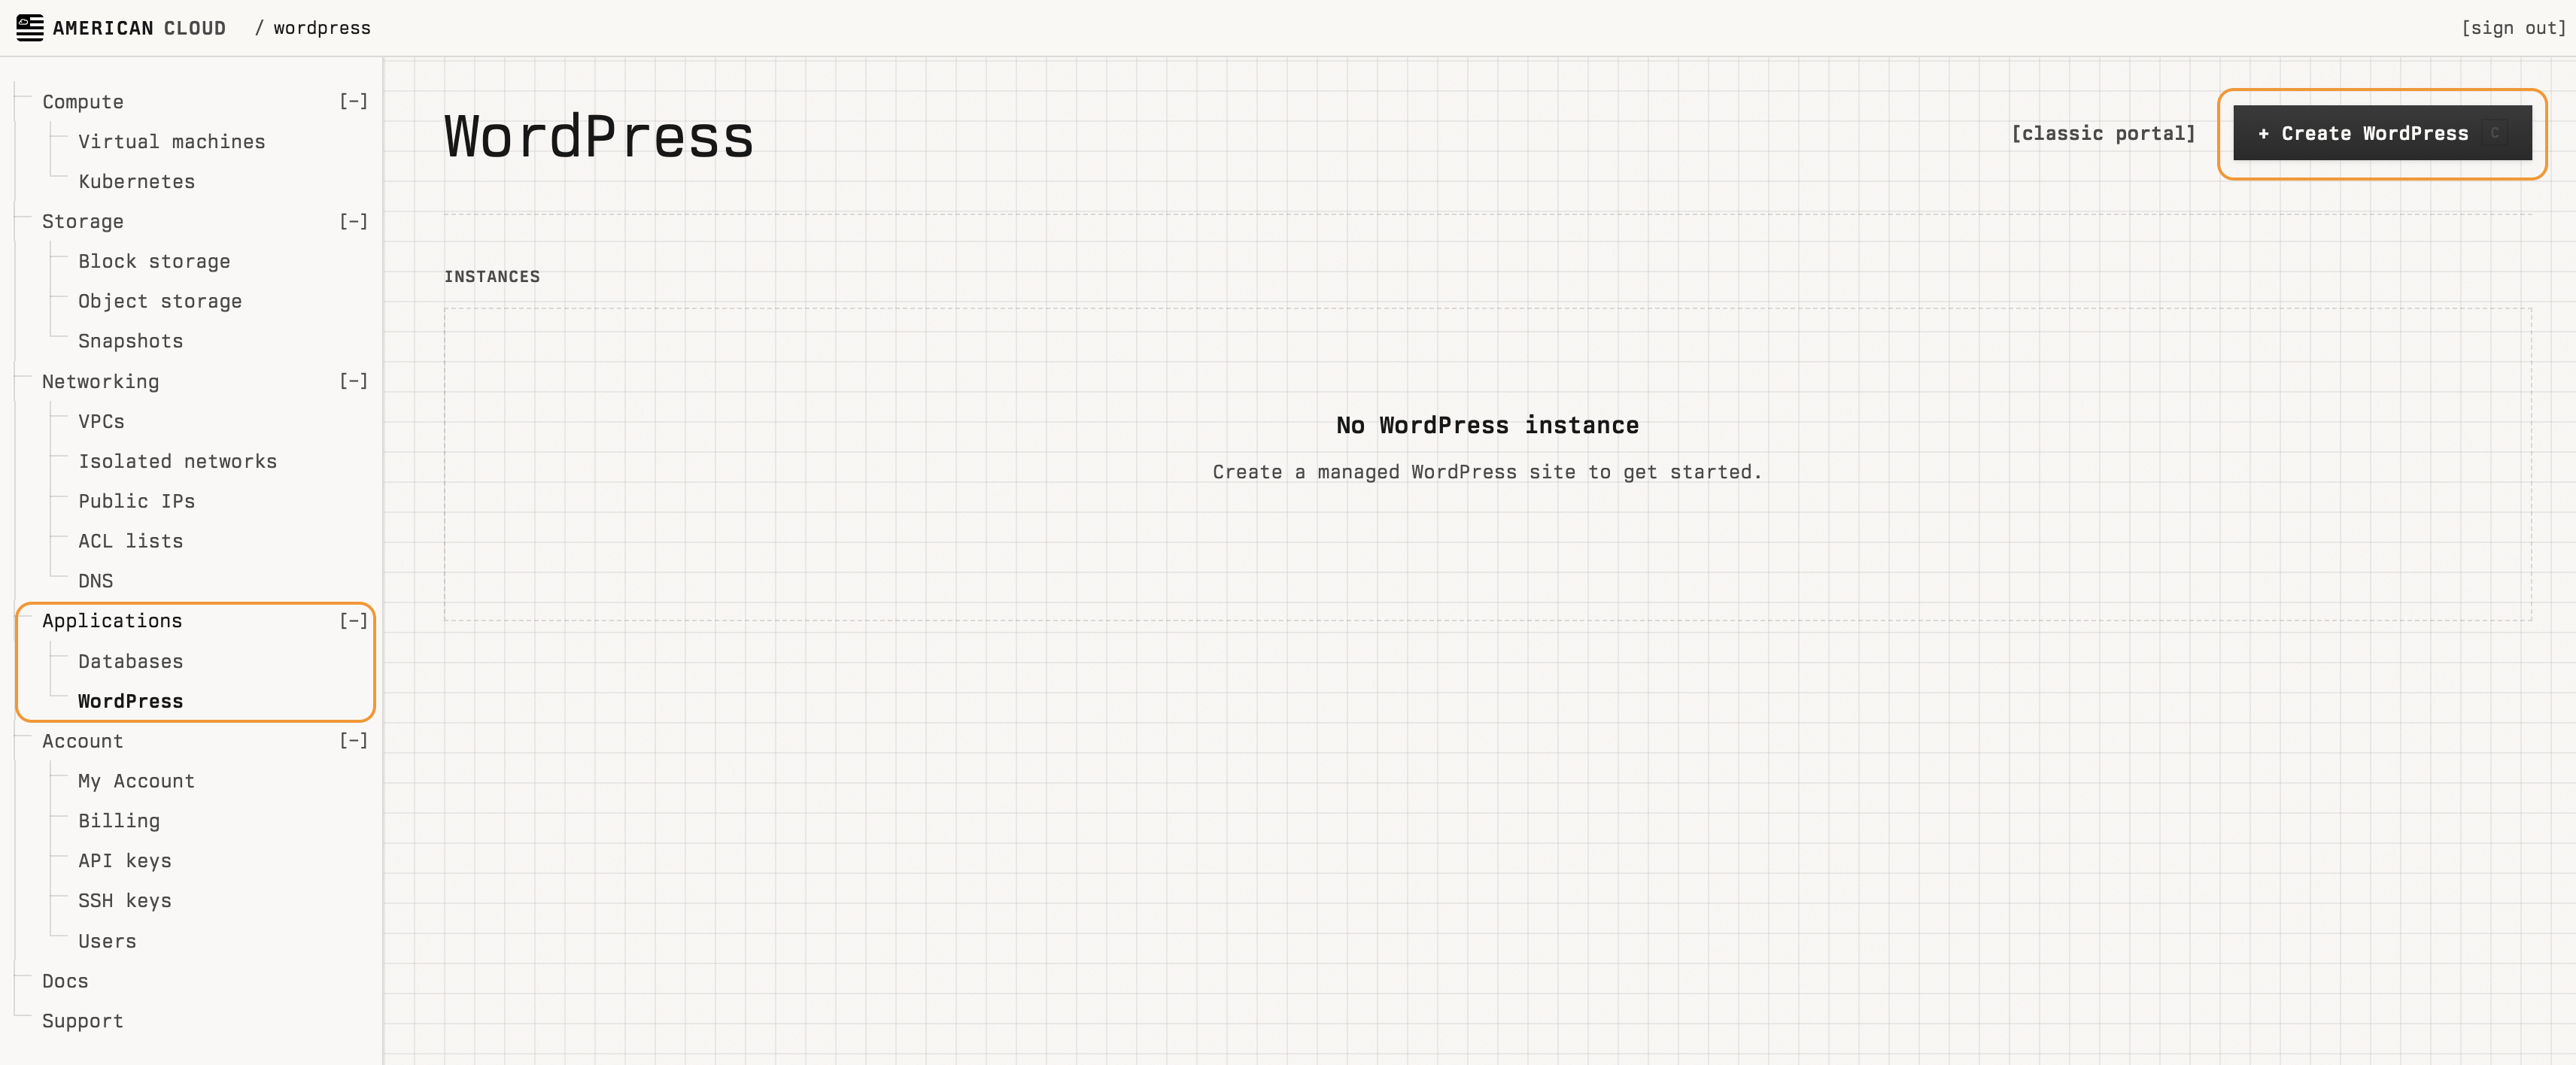
- In the left navigation, under Applications, select WordPress.
- In the top right of the WordPress page, click + Create WordPress.
-
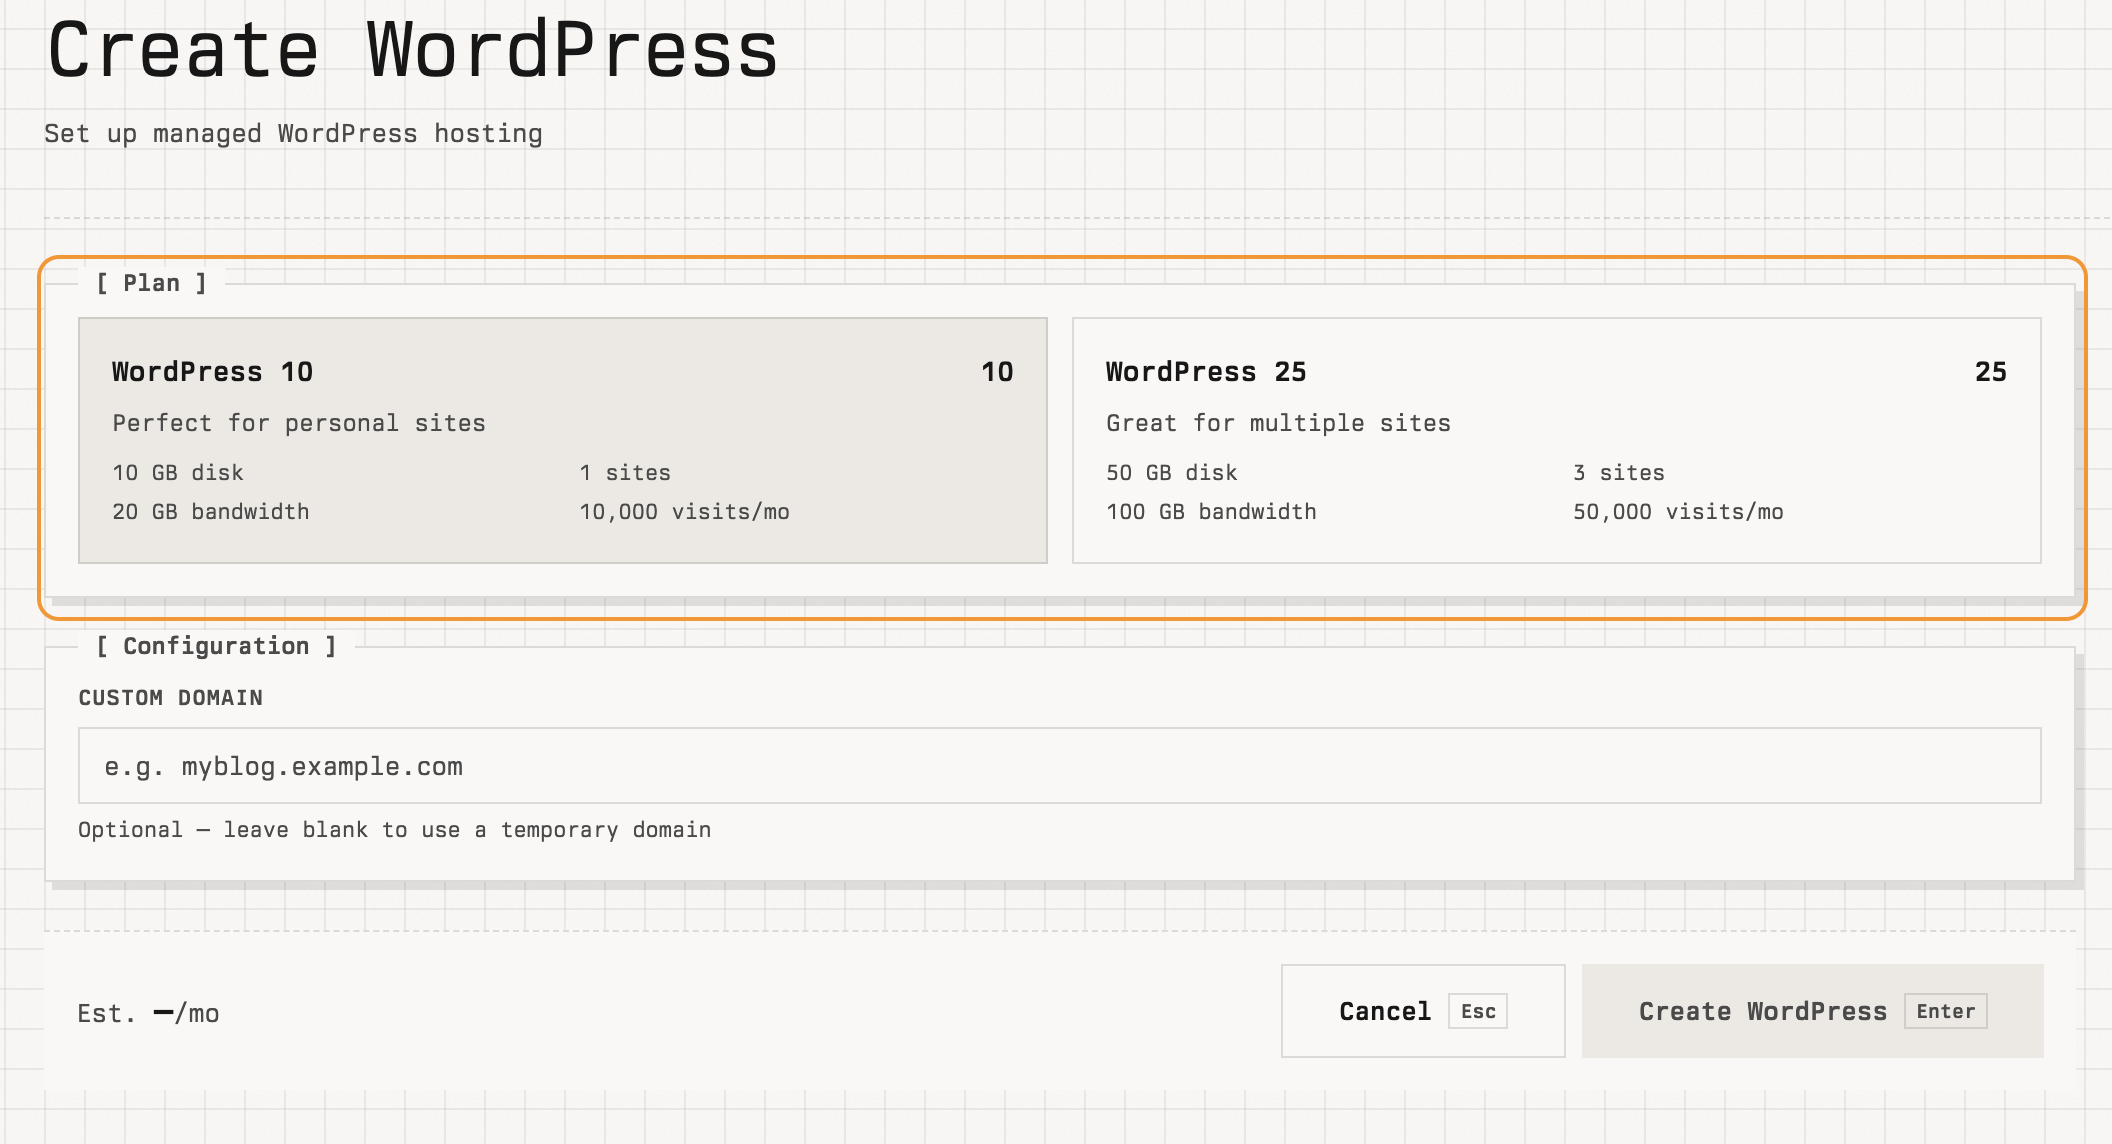
On the Create WordPress page, choose a Plan:
- WordPress 10 — 10 GB disk, 20 GB bandwidth, 1 site, 10,000 visits/mo.
- WordPress 25 — 50 GB disk, 100 GB bandwidth, 3 sites, 50,000 visits/mo.
For larger or customized plans, see Enterprise WordPress plans.
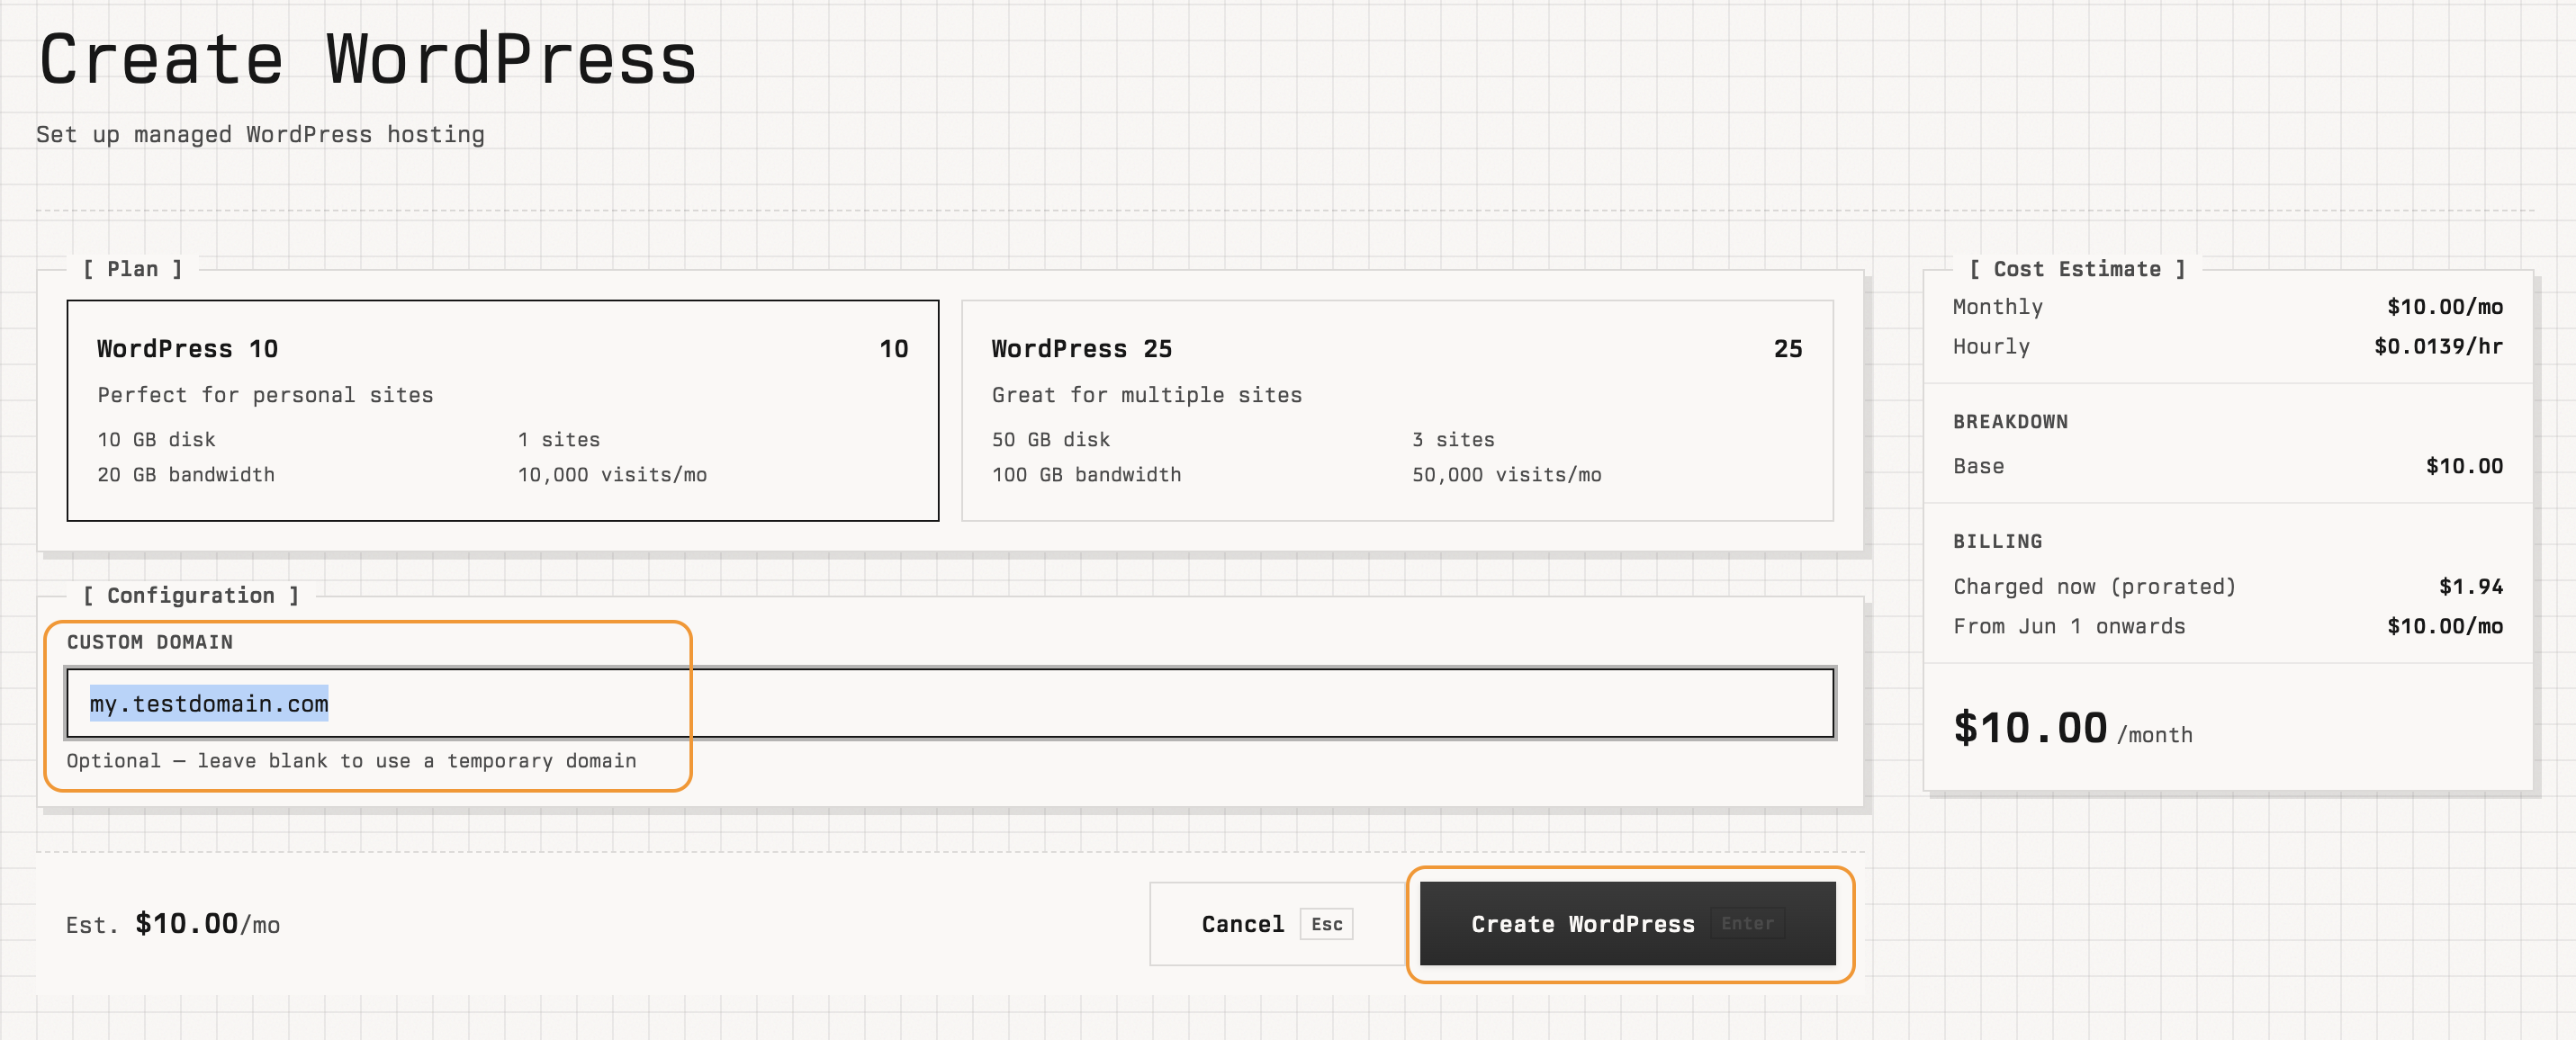
- In the Configuration section, optionally enter a Custom domain (for example,
my.testdomain.com). Leave it blank to use a temporary*.wpsquared.sitedomain — you can attach a custom domain later. - Review the cost estimate (monthly, hourly, prorated amount charged today) on the right, then click Create WordPress.
The new instance appears in the Instances list with status PROVISIONING.

Once status is READY, click View to open the instance.

Manage your instance
The instance detail page shows everything you need to manage the hosting and its sites.
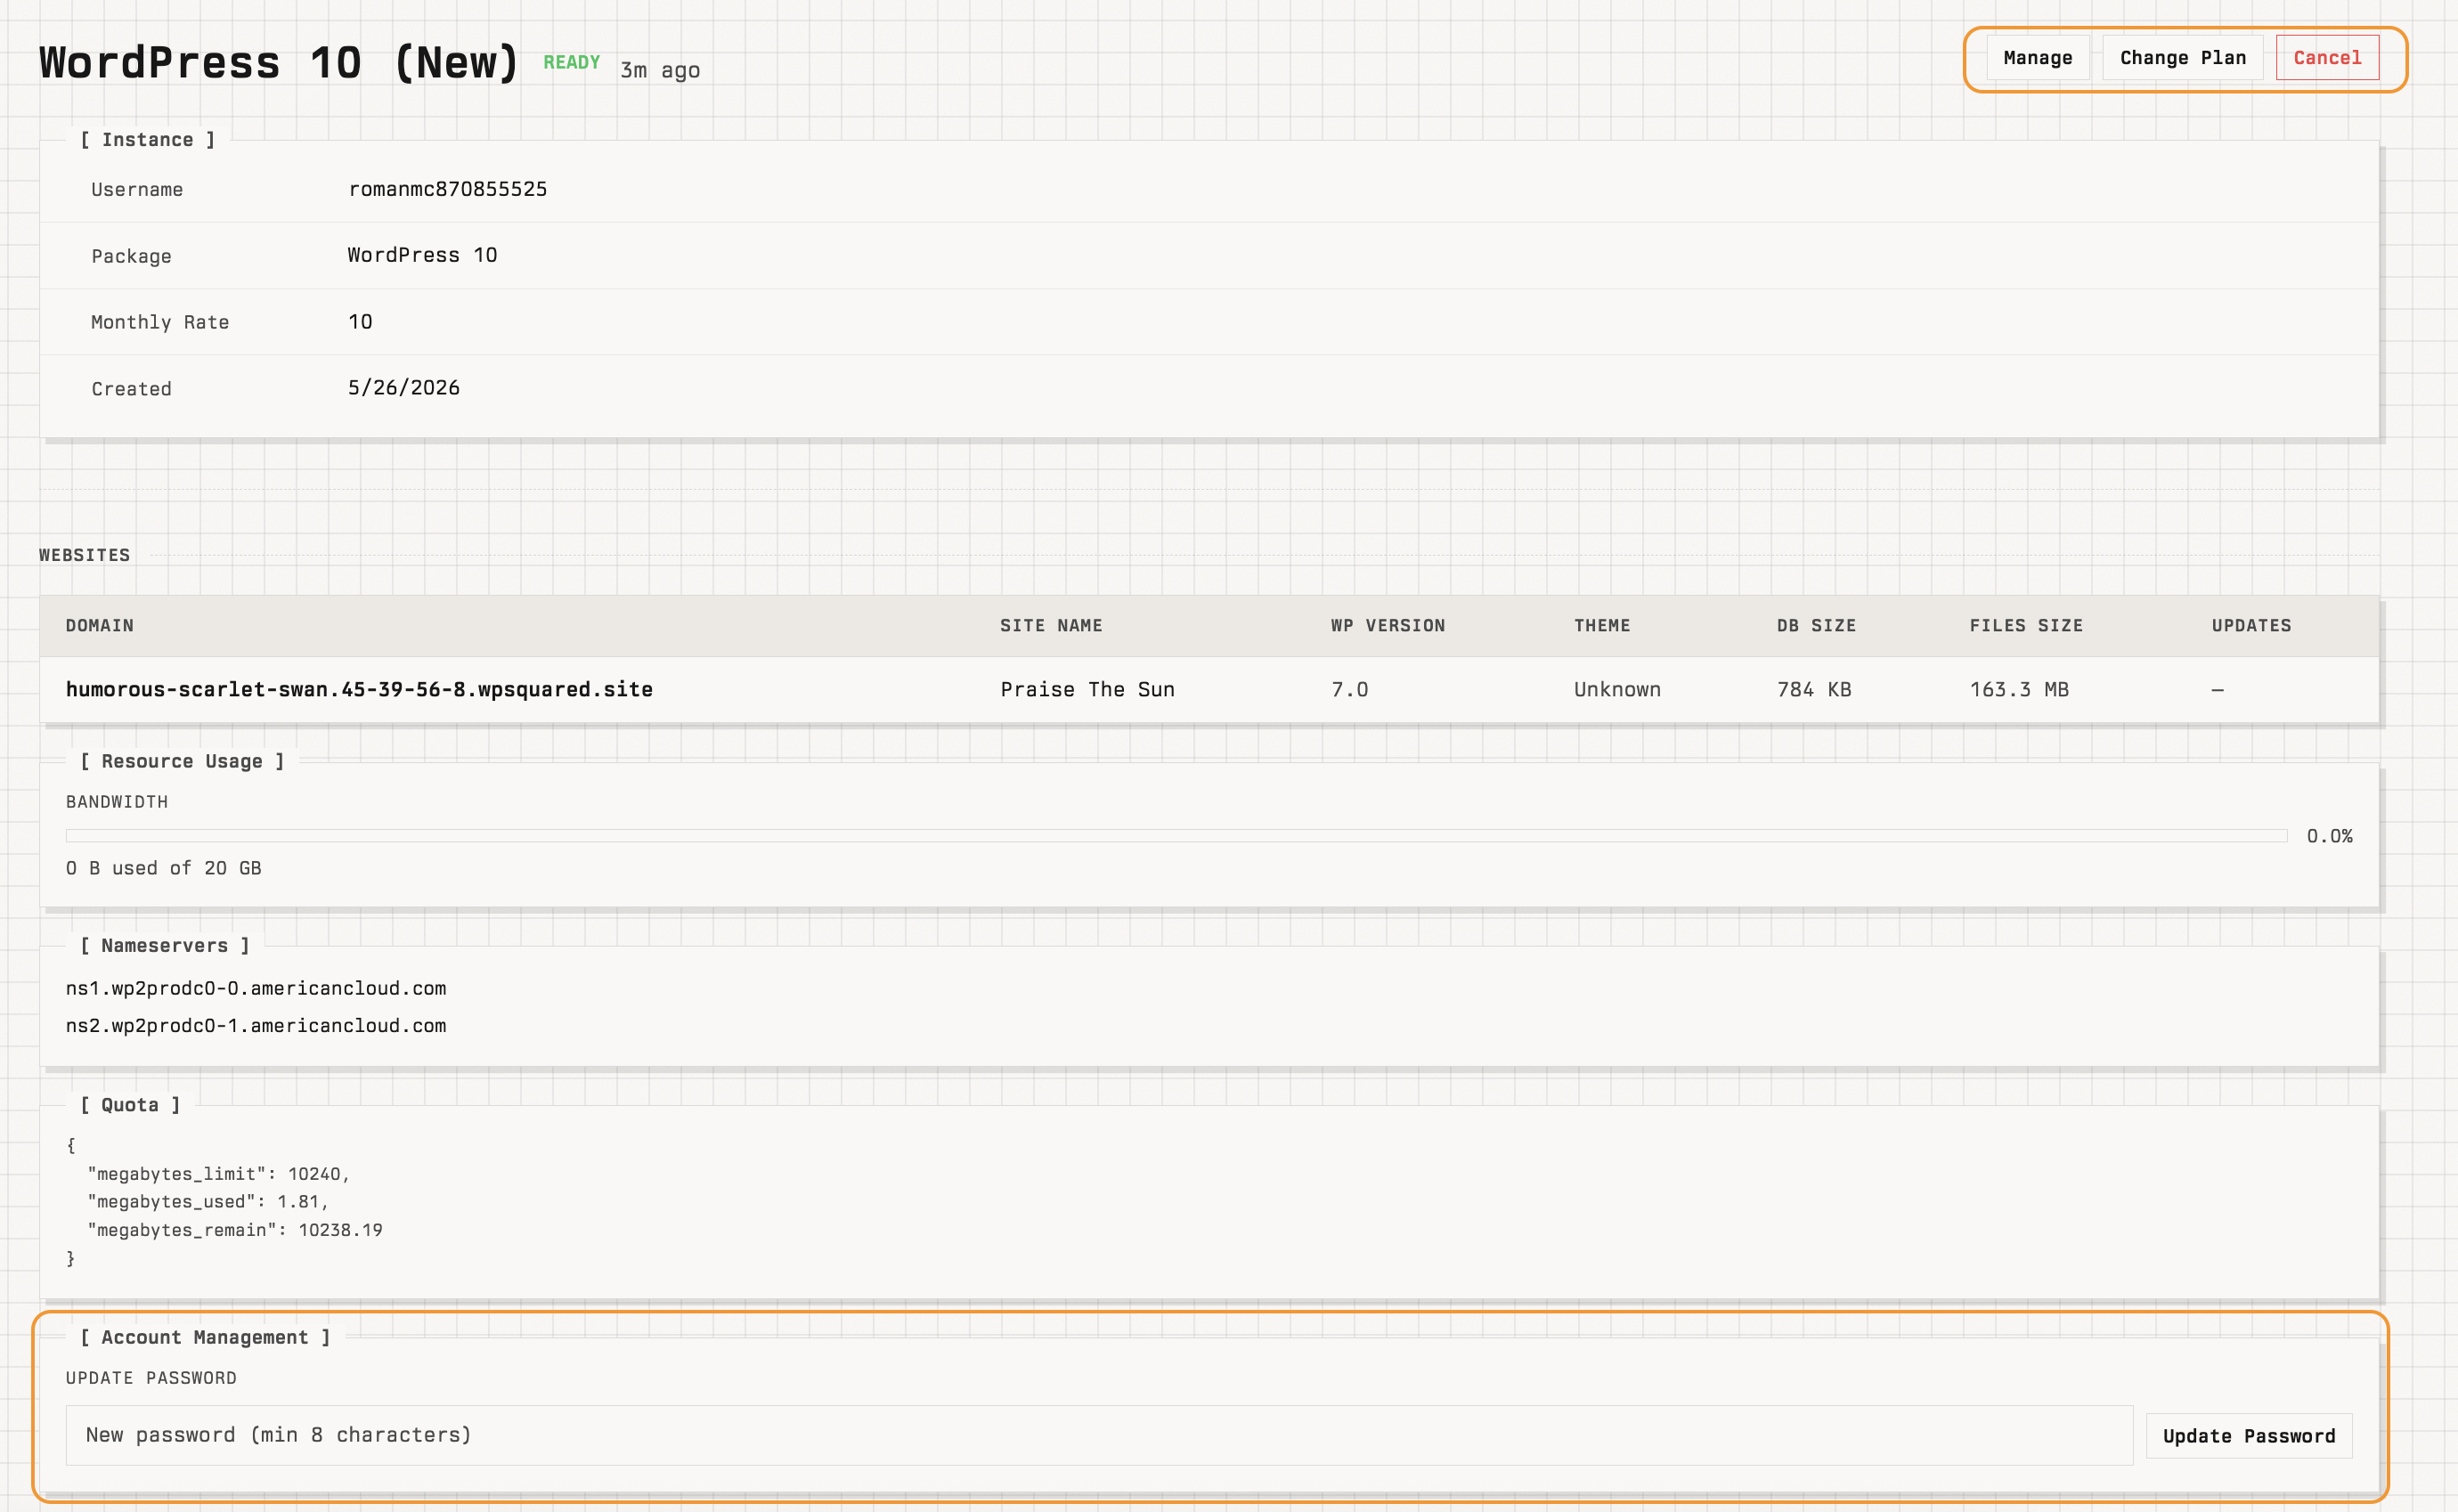
- Instance — username, package, monthly rate, creation date.
- Websites — every site on this instance with its domain, name, WP version, theme, DB and files size.
- Resource Usage — bandwidth consumed against the plan's allowance.
- Nameservers — the DNS servers to point your custom domain at (see Attach a custom domain).
- Quota — per-resource limits for this plan.
- Account Management — update the WordPress admin password.
Top-right actions:
- Manage — open the in-browser site management tools.
- Change Plan — upgrade or change to a different plan.
- Cancel — cancel and remove the instance.
Attach a custom domain
When you create an instance without a custom domain, the site is reachable at a temporary *.wpsquared.site address shown in the Websites table.

To use your own domain:
- Open the instance detail page and copy the values from the Nameservers panel. They look like
ns1.wp2rsdc0-0.americancloud.comandns2.wp2rsdc0-1.americancloud.com(the exact subdomains depend on your region). - Log in to your domain registrar and point the domain's nameservers at those values. American Cloud will automatically create the A and CNAME records for your site.
- Alternatively, keep your existing DNS provider (for example, Cloudflare) and create:
example.com       A      45.39.56.5
www.example.com   CNAME  example.com
Propagation usually completes within a few minutes.
Change plan
To move to a larger plan (for example, to host more sites or get more bandwidth):
- On the instance detail page, click Change Plan in the top right.
- Select the new plan and confirm.
The instance is re-provisioned to the new plan; existing sites and data are preserved.
Add another site
Multi-site plans (WordPress 25 and Enterprise) support multiple sites per instance.
- Open the instance and click Manage in the top right.
- In the management interface, choose Create New Site.
- Either pick a domain now or use a temporary domain and add a custom one later.
The new site appears in the Websites table once provisioning completes. If you've hit your plan's site limit, change plan first.
Update the WordPress admin password
On the instance detail page, scroll to Account Management, enter a new password (minimum 8 characters), and click Update Password.
Migrations and support
- See WordPress migrations for moving an existing site to American Cloud.
- For help, contact us at americancloud.com/contact-us.