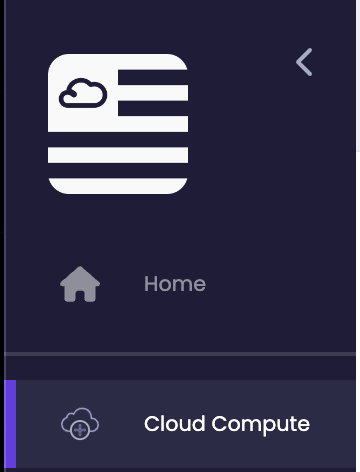
Cloud Compute
Last updated: May 20, 2026
Cloud compute refers to the use of remote computing resources delivered over the internet, such as virtual machines (VMs) or containers, provided by cloud service providers. These resources can be configured and managed remotely, allowing users to run applications, store data, and perform computing tasks without having to invest in and maintain their own physical infrastructure. Cloud compute offers scalability, flexibility, and cost-effectiveness, as users can pay for only the resources they need and easily adjust their computing capacity as requirements change.
Deploy a virtual machine
- Log in to the American Cloud portal with a valid account.
- In the left navigation, under Compute, select Virtual machines.
- In the top right of the Virtual machines page, click + Create VM.
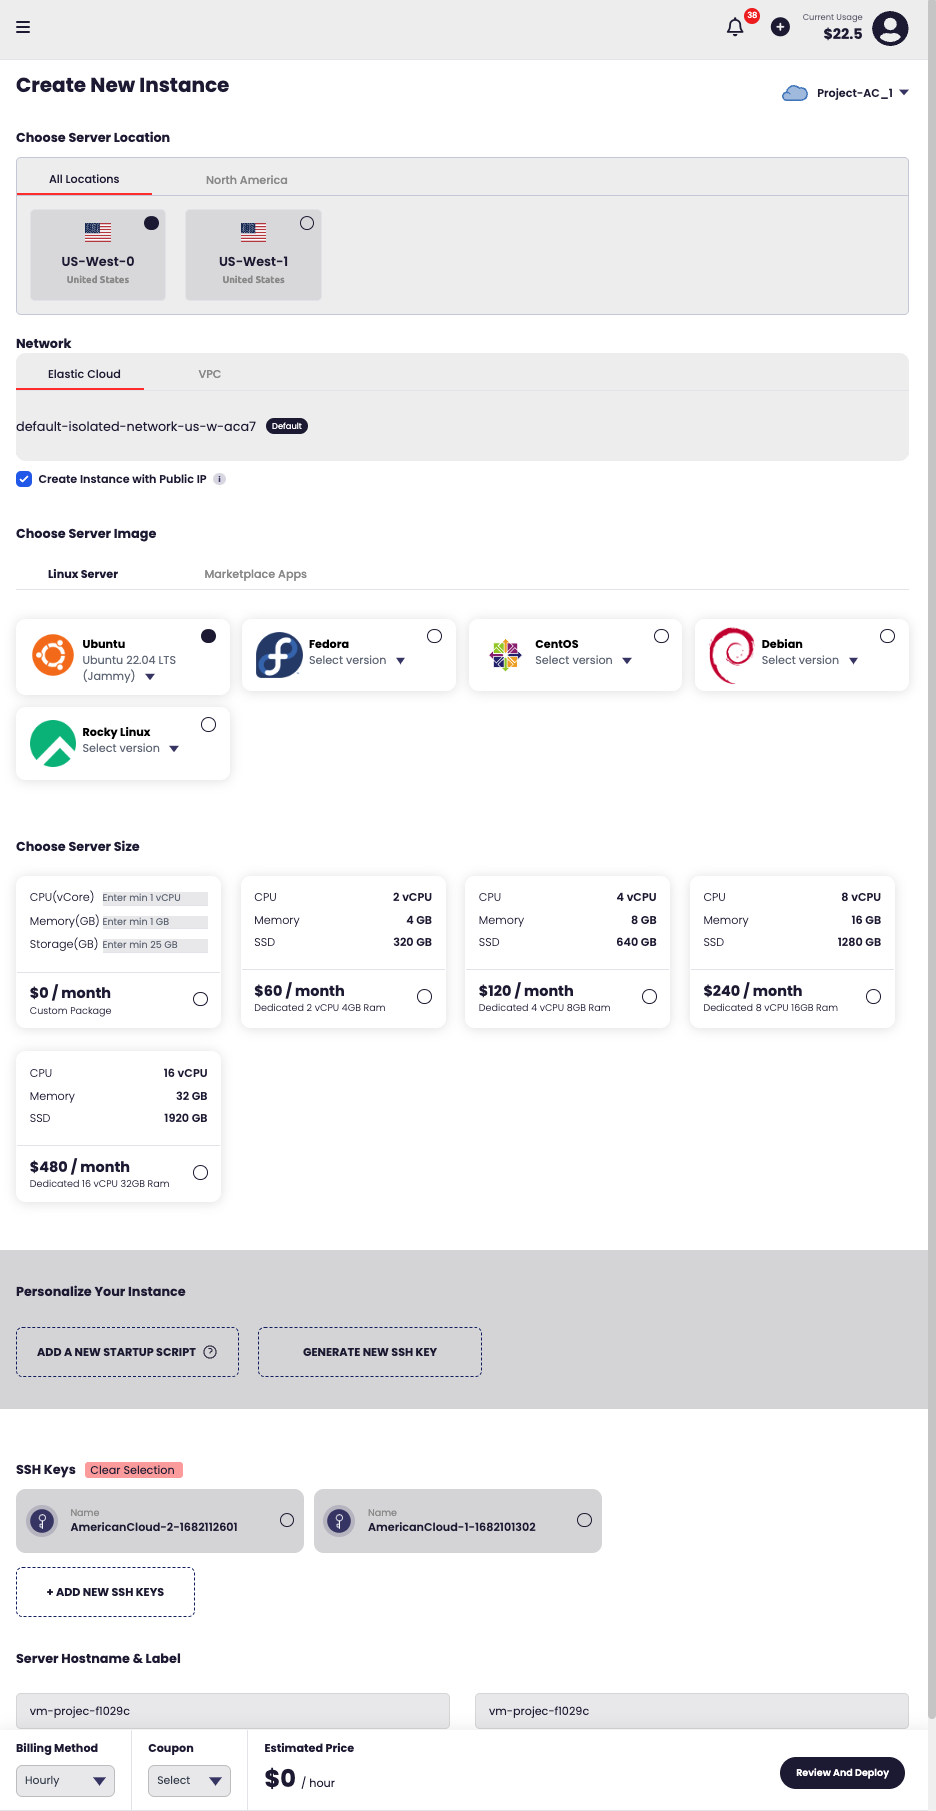
- On the Create virtual machine page, fill out the Configuration section:
VM name
Enter a name for the VM. Lowercase letters, numbers, and hyphens only (for example, test-vm-01). Use a unique name so it's easy to identify the instance later.
Region
Choose the geographic region where the VM will run (for example, US Central).
Package type
Select a package type (for example, Standard Custom). The package type determines the available CPU, memory, and storage ranges shown in Hardware Specifications.
Deploy from
Choose what to deploy from:
- Operating system — Deploy a standard OS image.
- Marketplace app — Deploy a preconfigured marketplace application.
For more information on marketplace apps, see the Marketplace category.
Operating system
If you selected Operating system above, choose the OS image (for example, Ubuntu 26.04 LTS).
Network
Choose a network for the VM. Select Create one for me to have American Cloud provision a network automatically, or pick an existing VPC from the dropdown.
For more information about networking options, see the Networking category.

- Configure the Hardware Specifications section:
CPU
Use the slider to set the number of vCPUs (1–12 vCPU).
Memory
Use the slider to set the amount of memory (1–128 GB).
Root disk
Use the slider to set the size of the root disk (25–10,000 GB).
- Configure the Options section:
Billing period
Choose Hourly or Monthly. Monthly billing offers a discount for sustained use.
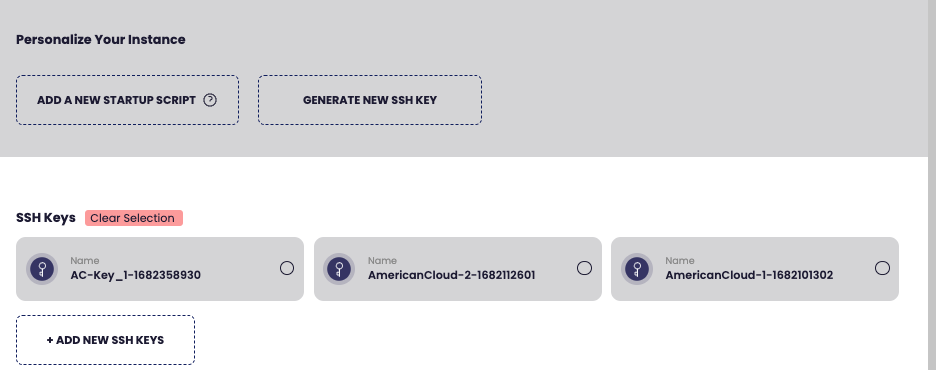
SSH keys
Select any SSH keys you want to add to the VM. Keys must be added to your account before they appear here.
For more information on adding SSH keys, see Managing SSH keys.
User data / cloud-init
Optionally, paste a startup script (for example, a bash script that installs nginx). The script runs on first boot and is automatically base64 encoded.
- Review the estimated cost shown at the bottom of the page and click Create VM.
Note: The first VM may take up to a minute to deploy.
After the VM is created, you are redirected to its details page.
Manage a virtual machine
To manage a VM, open the Virtual machines page from the left navigation, then click the VM's name to open its details page.
The details page shows the VM's status, IP address, region, and network at the top, followed by Hardware and Configuration panels. The top right of the page has three controls: Power, Manage, and Delete.
Power
The Power menu controls the running state of the VM.
- Start — Power on a stopped VM.
- Stop — Power off the VM.
- Restart — Power cycle the VM.

Manage
The Manage menu provides actions for configuring the VM.
- Console — Open a browser-based console to the VM.
- Scale — Change the VM's CPU, memory, or root disk size.
- Change Hostname — Update the VM's hostname.
- Reset Password — Generate a new root password. Available only when the VM is in a stopped state.
- Reinstall — Wipe the VM and reinstall the operating system.
Note: Reinstalling a VM destroys all data on the root disk. Take a snapshot first if you need to preserve anything.
Delete
The Delete button in the top right permanently removes the VM and its root disk. This action cannot be undone.
Hardware and Configuration
The Hardware panel shows the VM's CPU, memory, root disk, and package type. The Configuration panel shows the image, billing period, IP address, network, region, and creation time.
To change hardware (CPU, memory, root disk), use Manage → Scale.
Metrics
The Metrics section shows CPU, memory, network, and disk graphs. Metrics become available after the VM has been running for at least one hour.
Root disk snapshots
Use the + Take Snapshot button to capture a point-in-time copy of the root disk. Snapshots can be used to restore the VM or to create a new VM from the same state.
Use a clear naming convention so snapshots are easy to identify later.
For more information on SSH keys, see Managing SSH keys. For firewalls and port forwarding, see the Networking category.