Deploying a Coolify instance
Last updated: May 29, 2026
Coolify is an open-source, self-hostable Platform as a Service (PaaS) — an alternative to Heroku, Netlify, and Vercel that lets you deploy applications, databases, and services on your own infrastructure. American Cloud's marketplace ships a one-click Coolify image so you can be up and running in a few minutes.
Create the Coolify VM
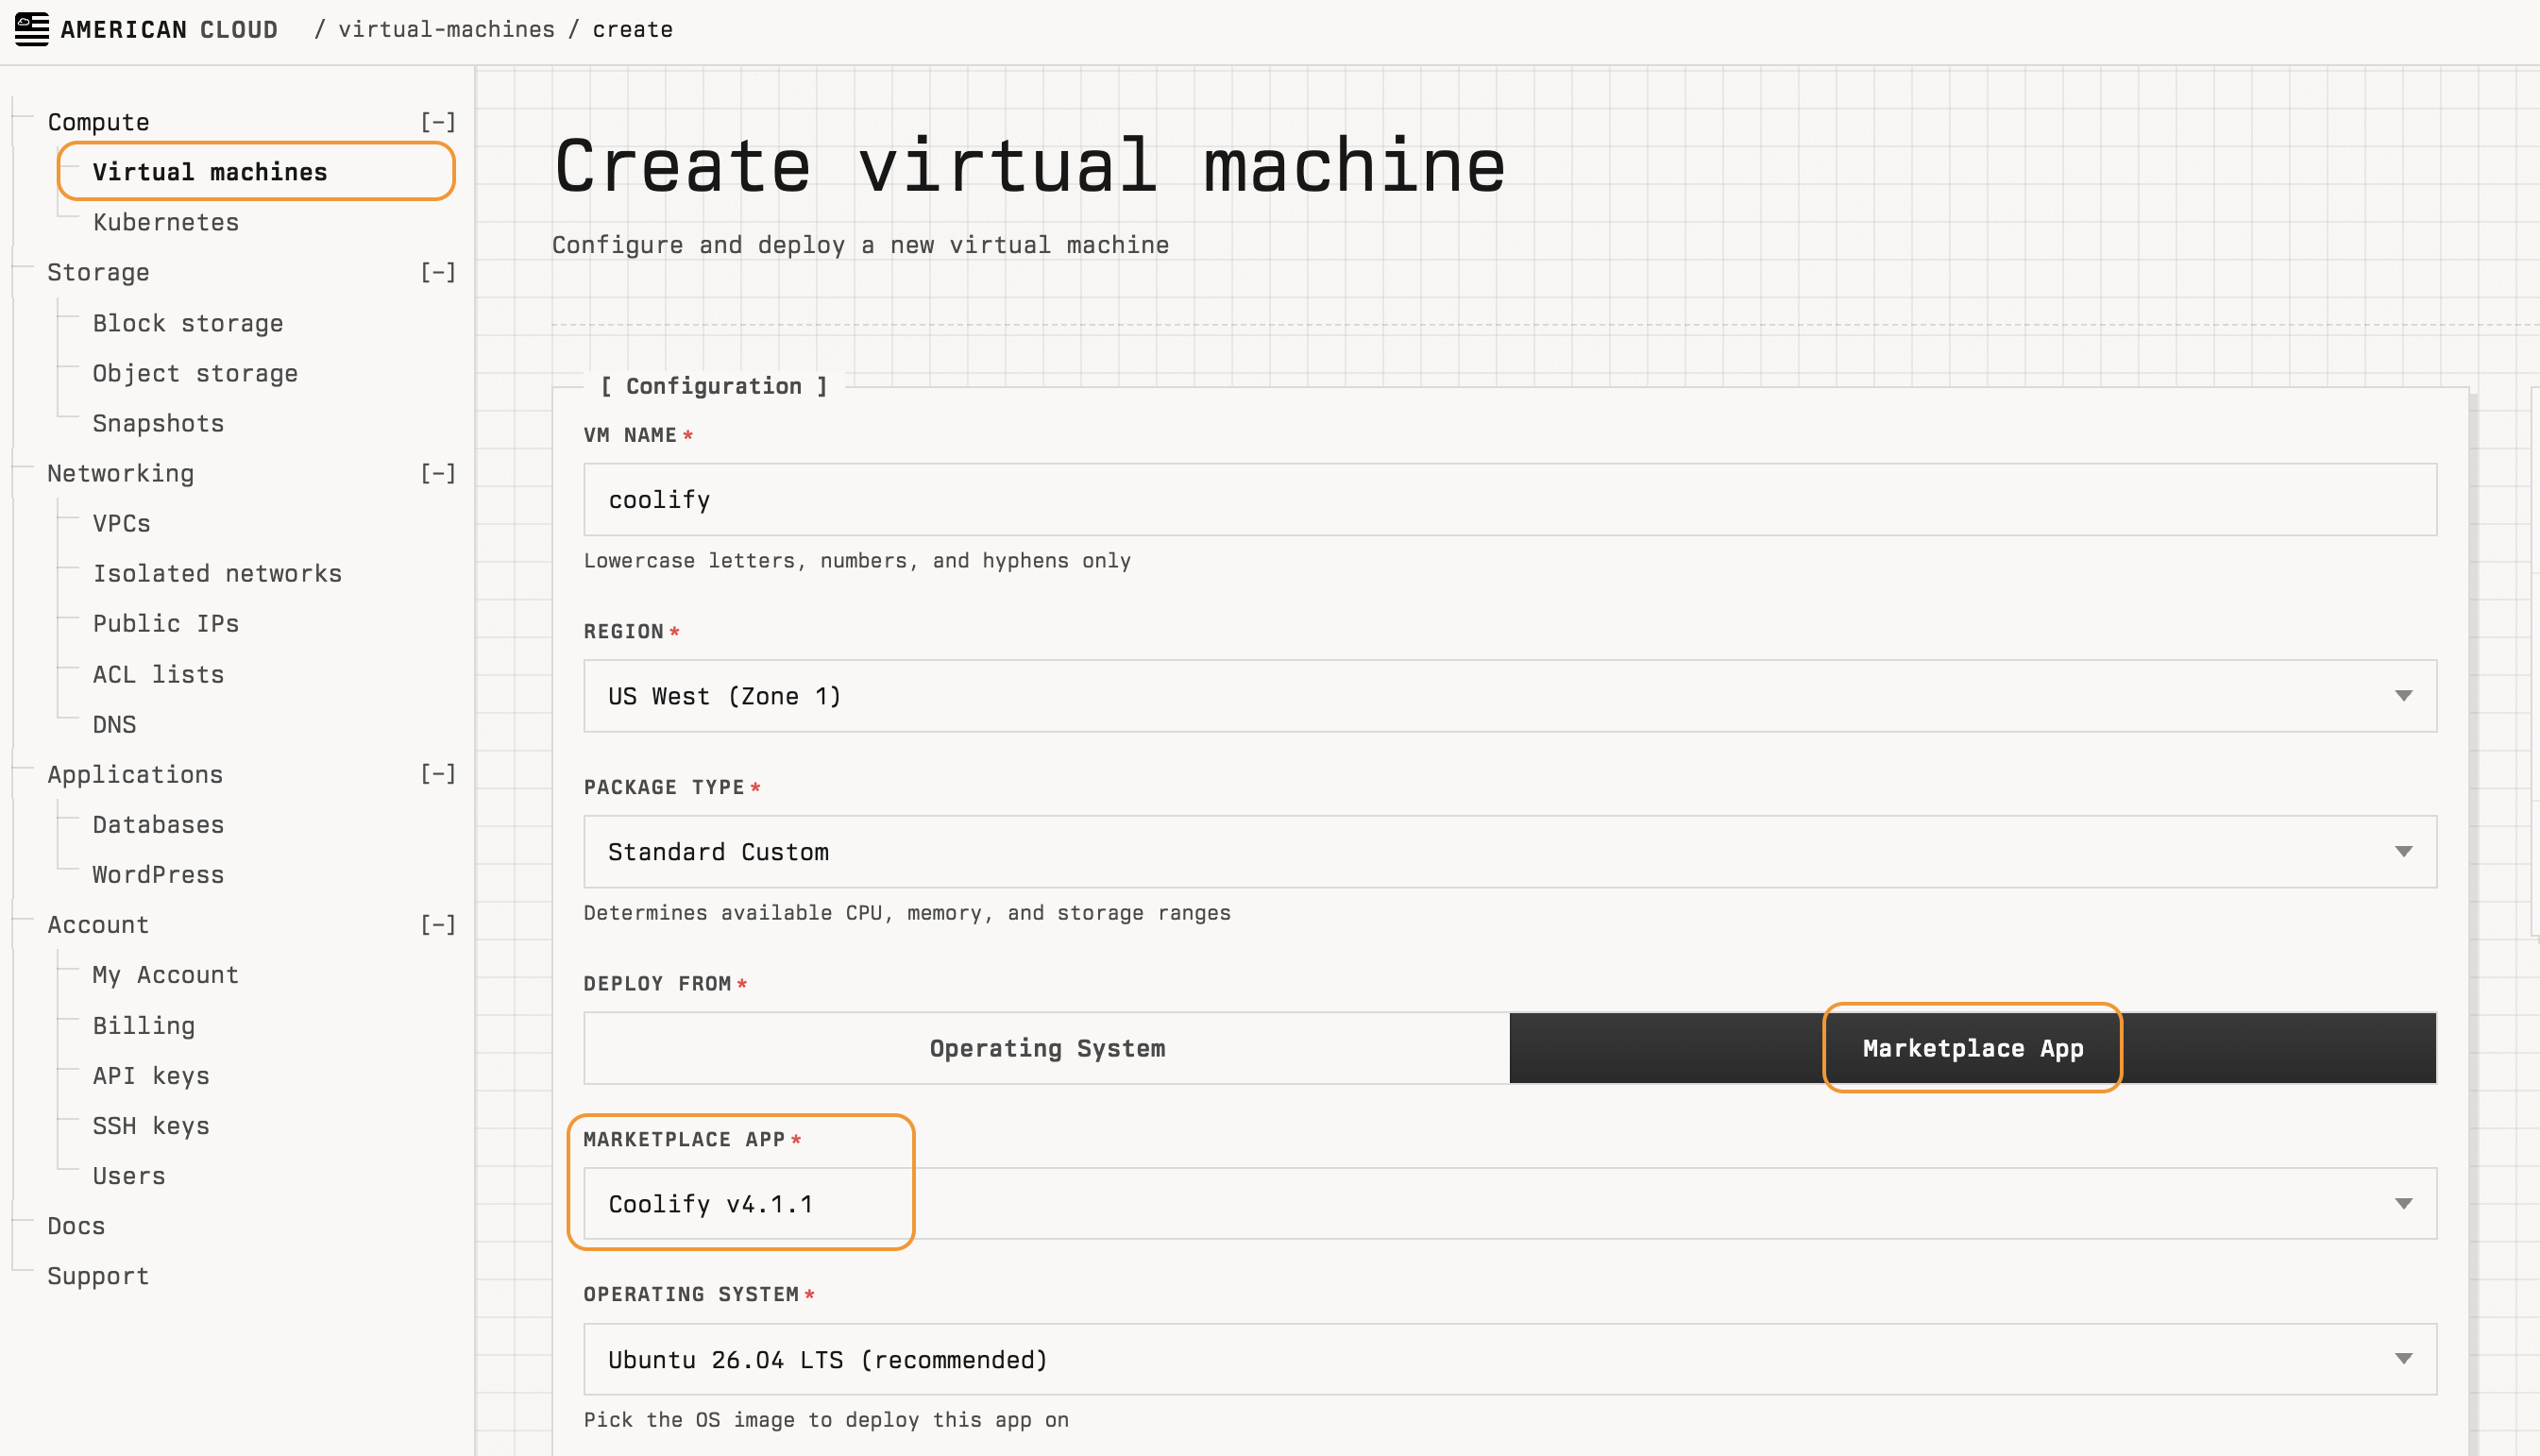
- In the left navigation, under Compute, select Virtual machines, then click + Create VM in the top right.
- On the Create virtual machine page, fill in the Configuration section:
- VM name — for example,
coolify. - Region — for example, US West (Zone 1).
- Package type — Standard Custom.
- Deploy from — choose the Marketplace App tab.
- Marketplace app — Coolify v4.1.1 (or the latest available).
- Operating system — the recommended OS shown by the marketplace image (for example, Ubuntu 26.04 LTS (recommended)).
- VM name — for example,
- In the Network field, leave Create one for me unless you want an existing VPC.
- Under Network access, expand Inbound internet access and click Set up now. This reserves a public IP and opens the ports Coolify needs:
- Inbound ports — keep SSH (22/TCP), HTTP (80/TCP), and HTTPS (443/TCP) checked.
- Additional ports — add
8000(TCP). The Coolify dashboard runs on this port. - Source CIDRs —
0.0.0.0/0to allow access from anywhere, or use My IP to restrict it to your address while you set things up.

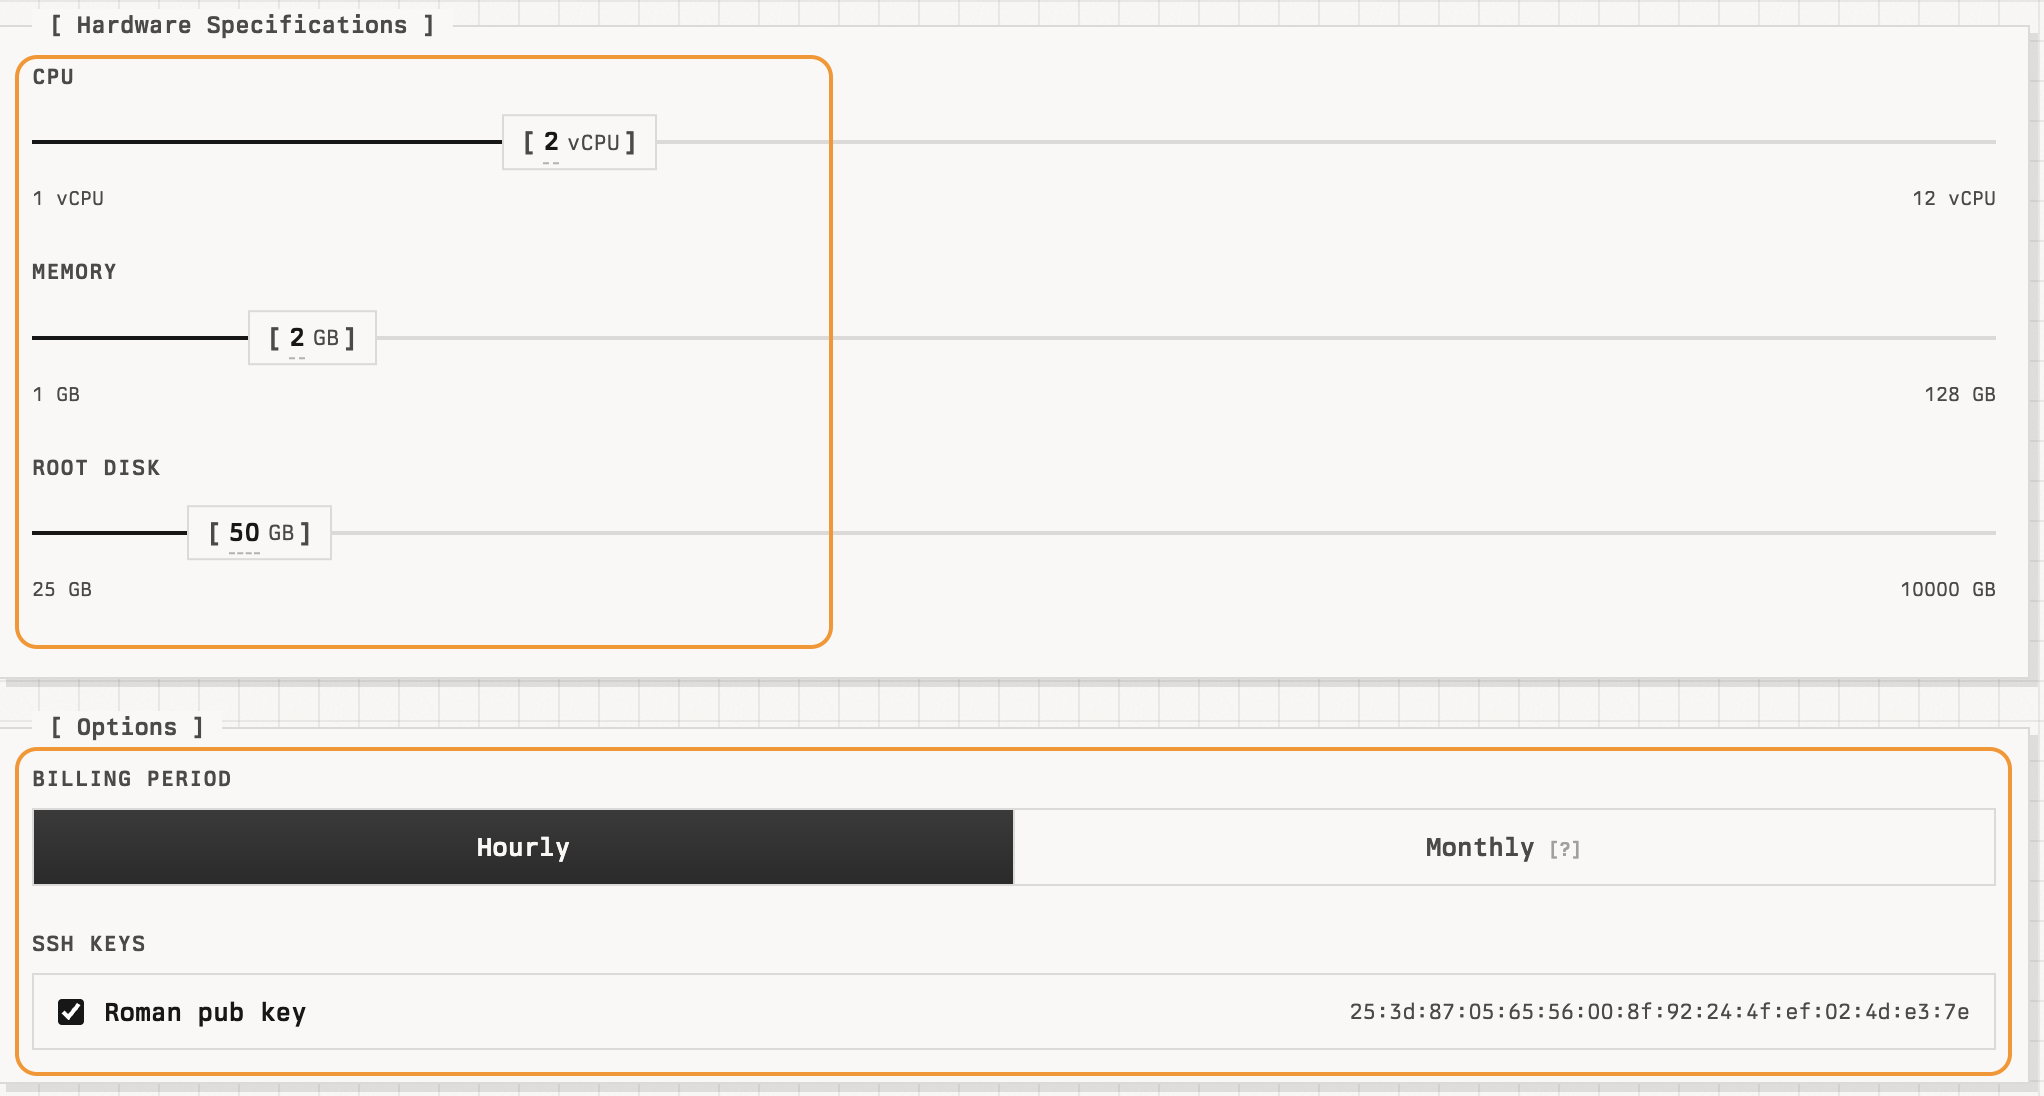
- Set the sliders in Hardware Specifications to fit your workload. A minimum of 2 vCPU / 2 GB memory / 50 GB root disk is a sensible starting point for a single-server Coolify install.
- In Options, choose a Billing period and check the SSH keys you want to attach so you can
sshinto the VM later.
- Click Create VM.
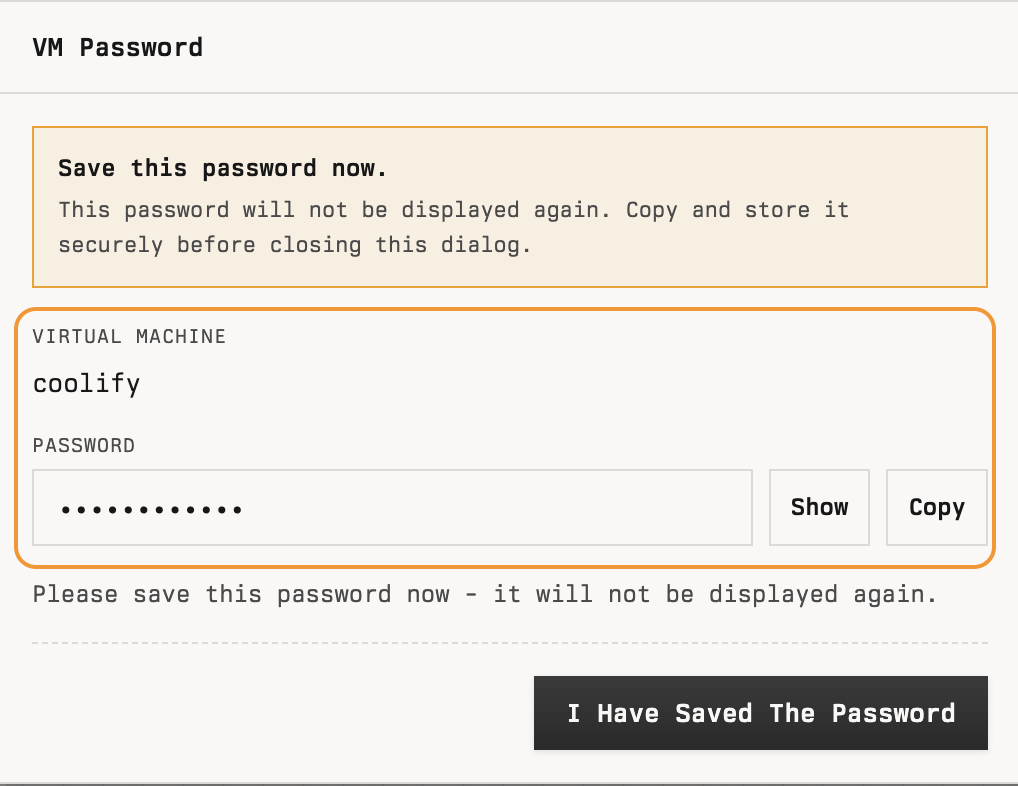
Save the VM password
After the VM is created, the portal shows a VM Password dialog once. Click Show to reveal it and Copy it into a password manager before closing — it cannot be retrieved later.
Once the VM reaches the READY state, copy its public IP from the details page.
Access Coolify
Open the Coolify dashboard in a browser:
Coolify access: http://<public-ip>:8000/
For example, if the VM's public IP is 203.0.113.42, browse to http://203.0.113.42:8000/.
The first time you visit the dashboard, register a user account and sign in.
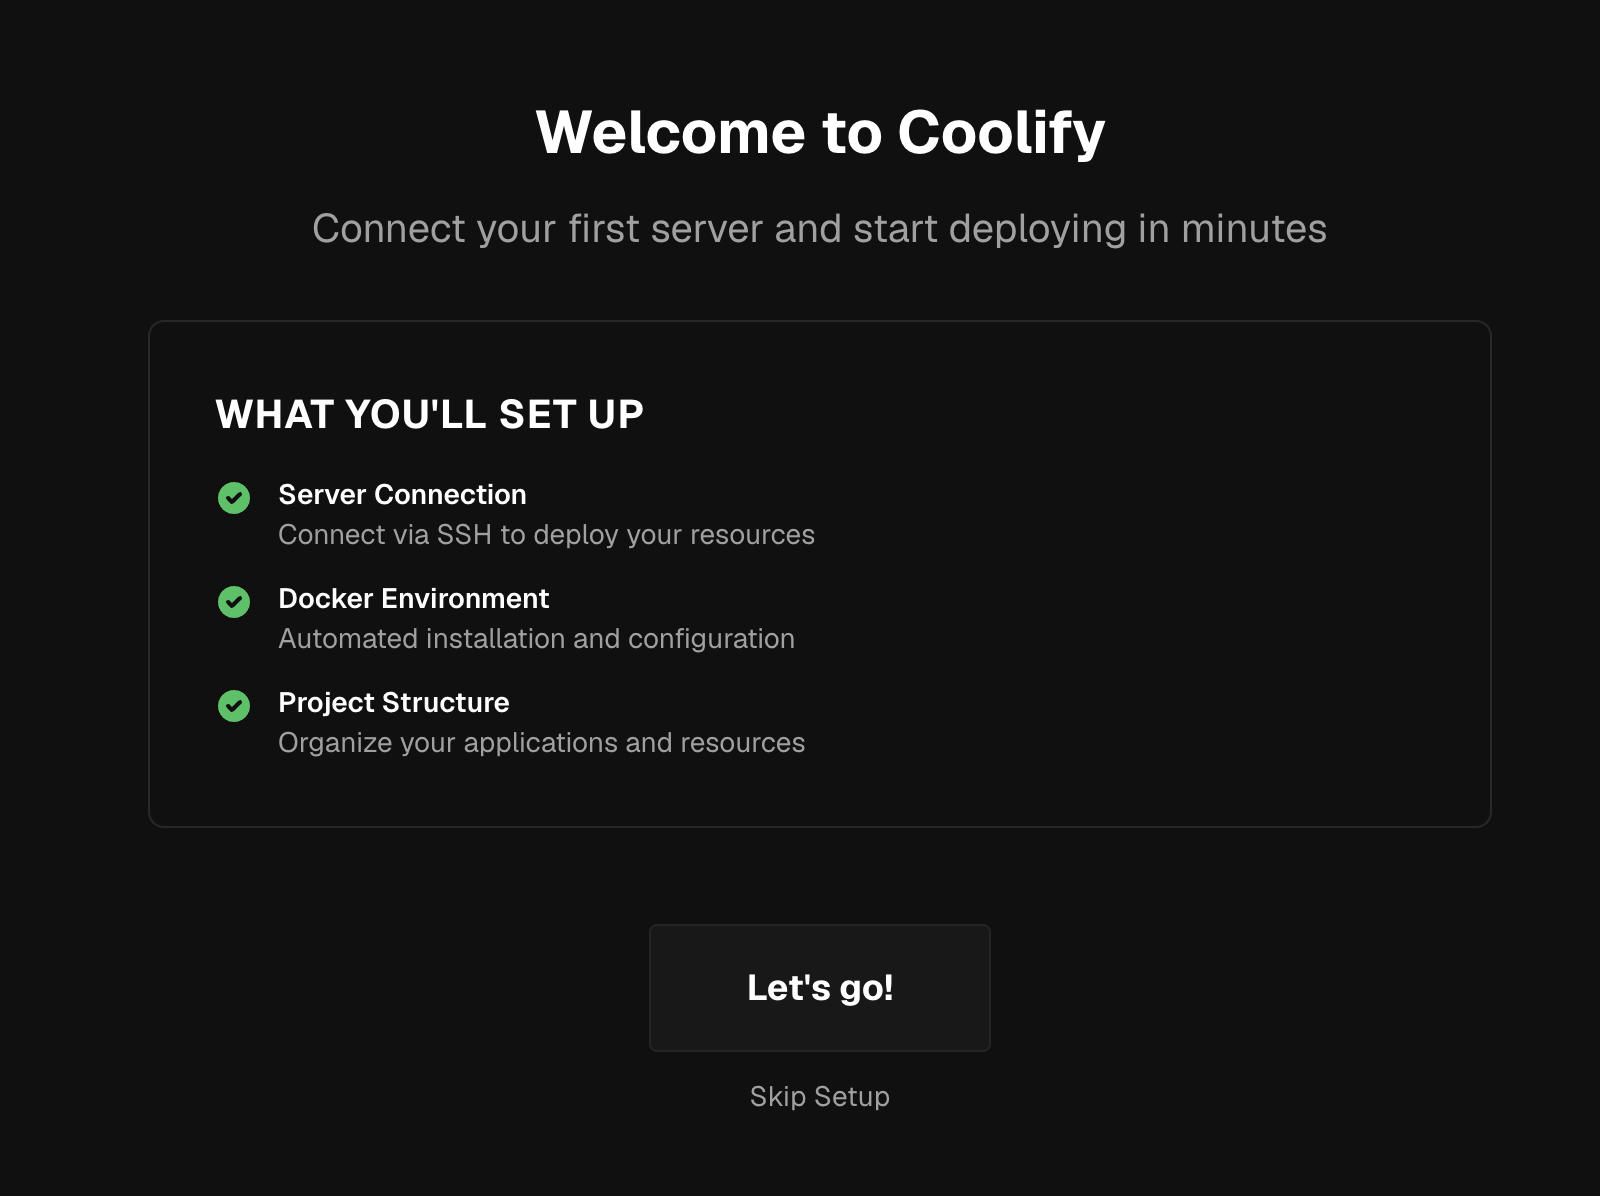
Welcome screen
Coolify walks you through a short onboarding. On the Welcome to Coolify screen, click Let's go!.
Choose a server type
On Step 1 — Server, pick This Machine (Quick Start). This deploys directly on the Coolify VM you just created and skips the SSH key exchange you'd need for a remote server.
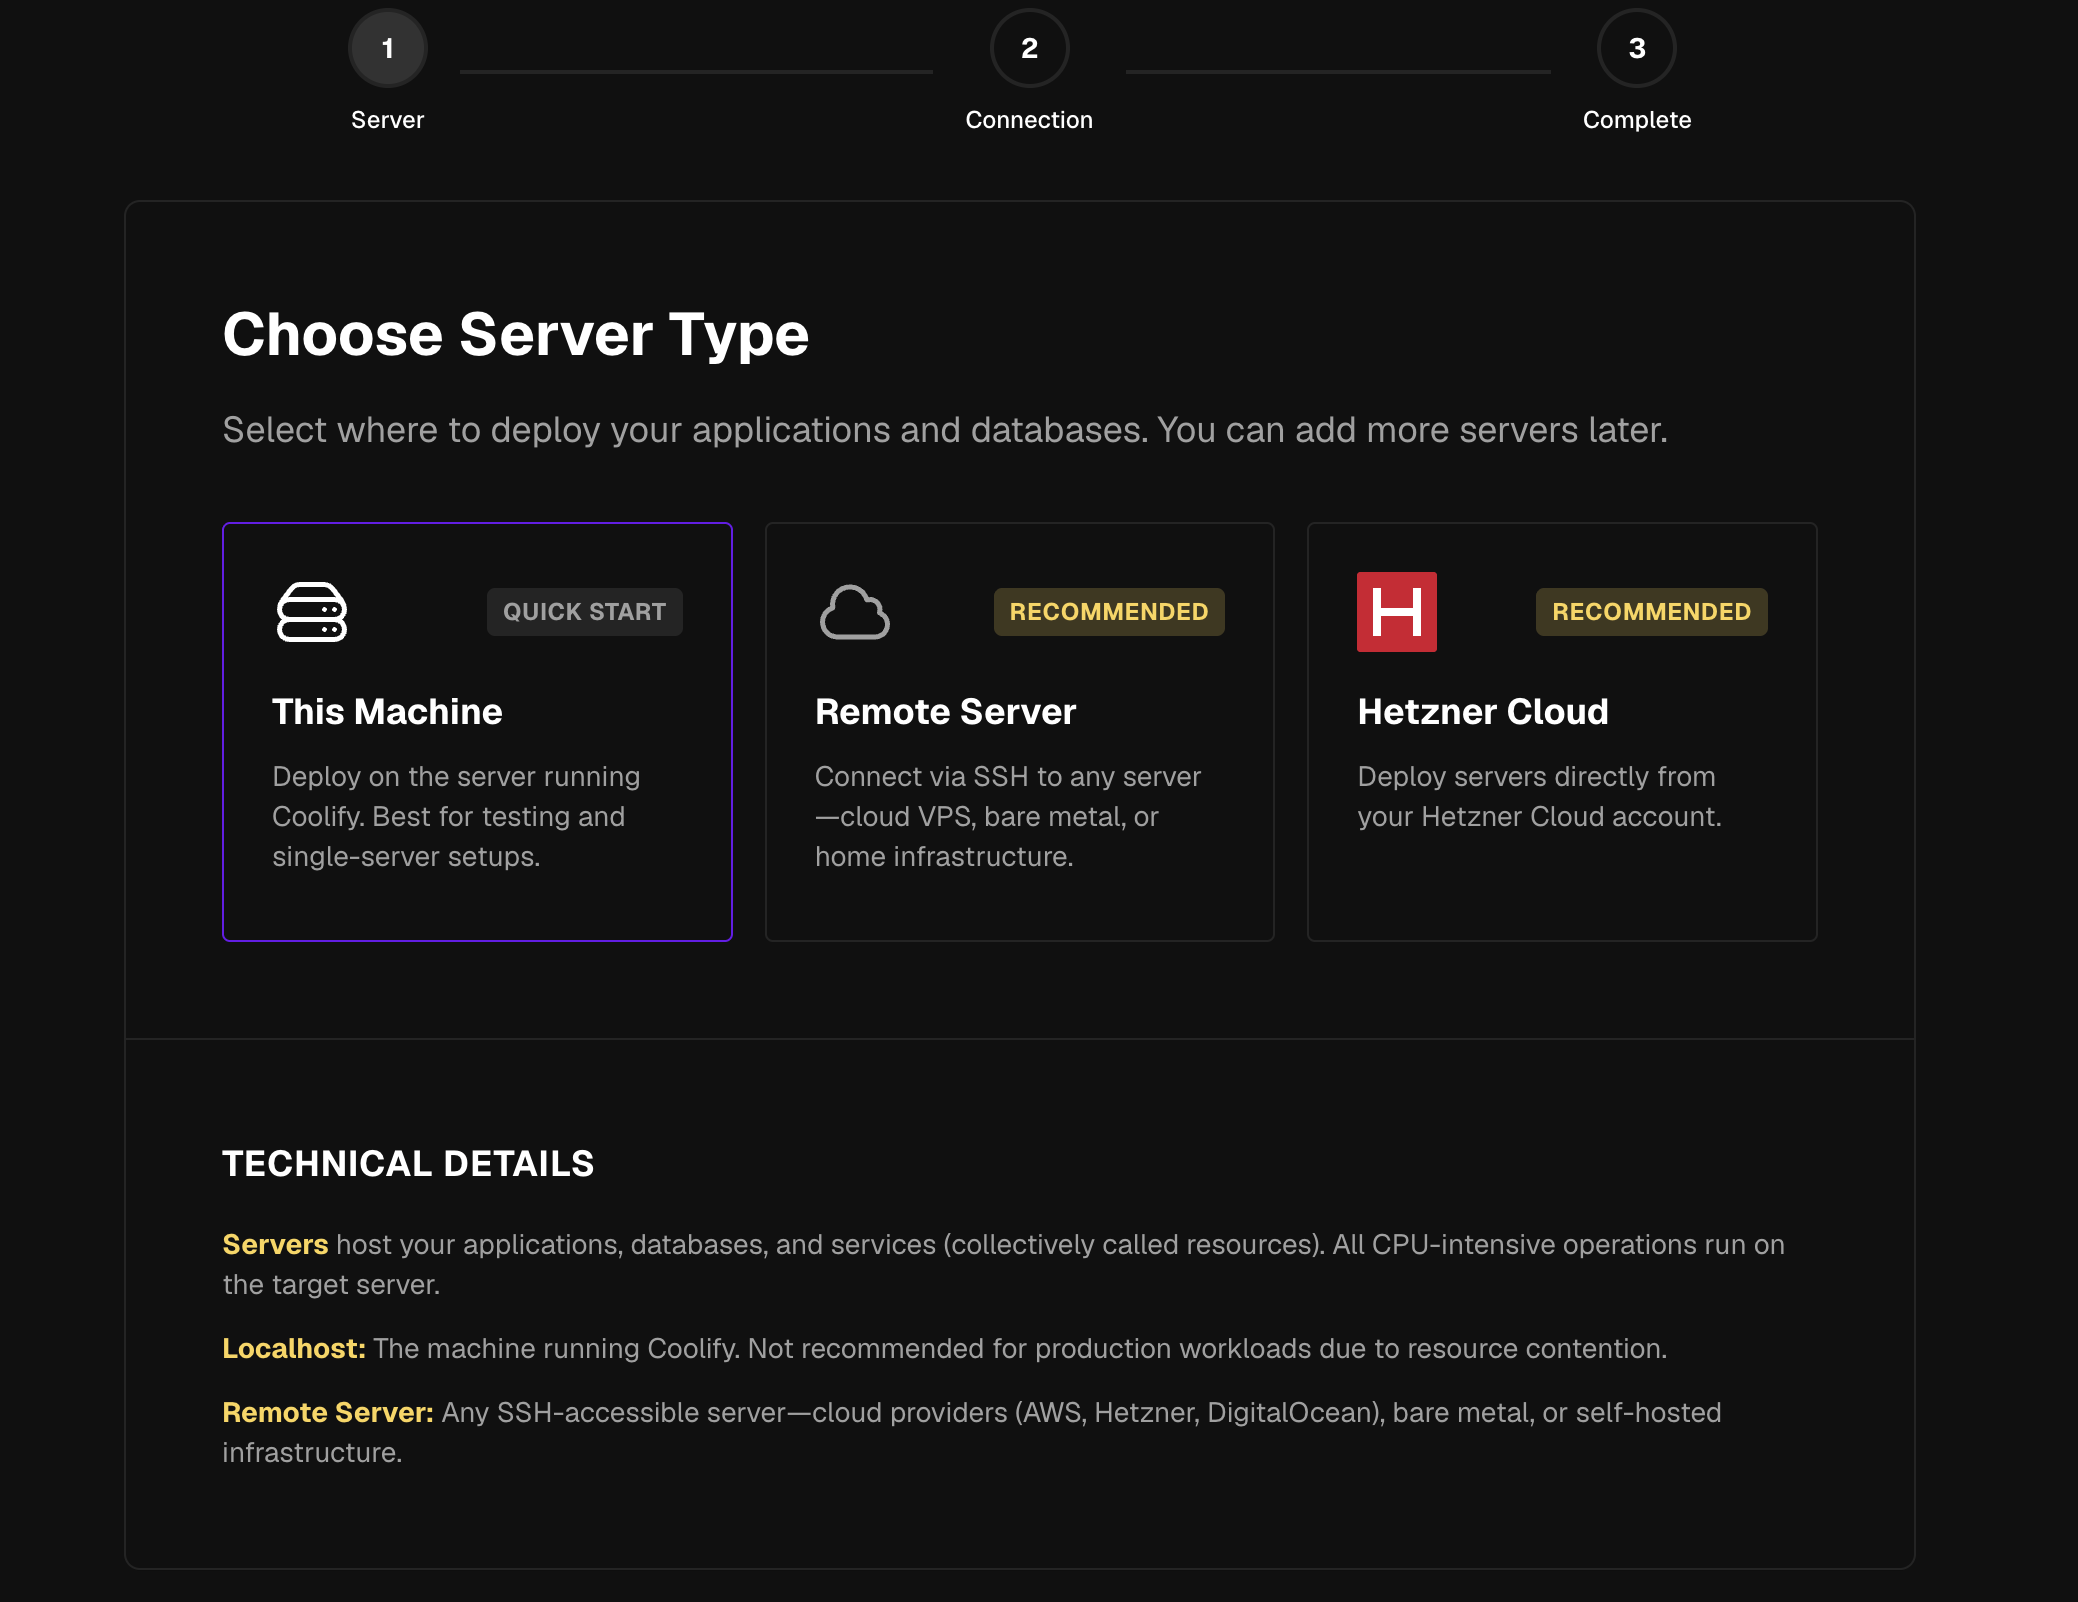
Tip: If you'd rather run Coolify here and deploy workloads to another machine, pick Remote Server instead and follow Coolify's prompts to add its public key to that server's
~/.ssh/authorized_keys.
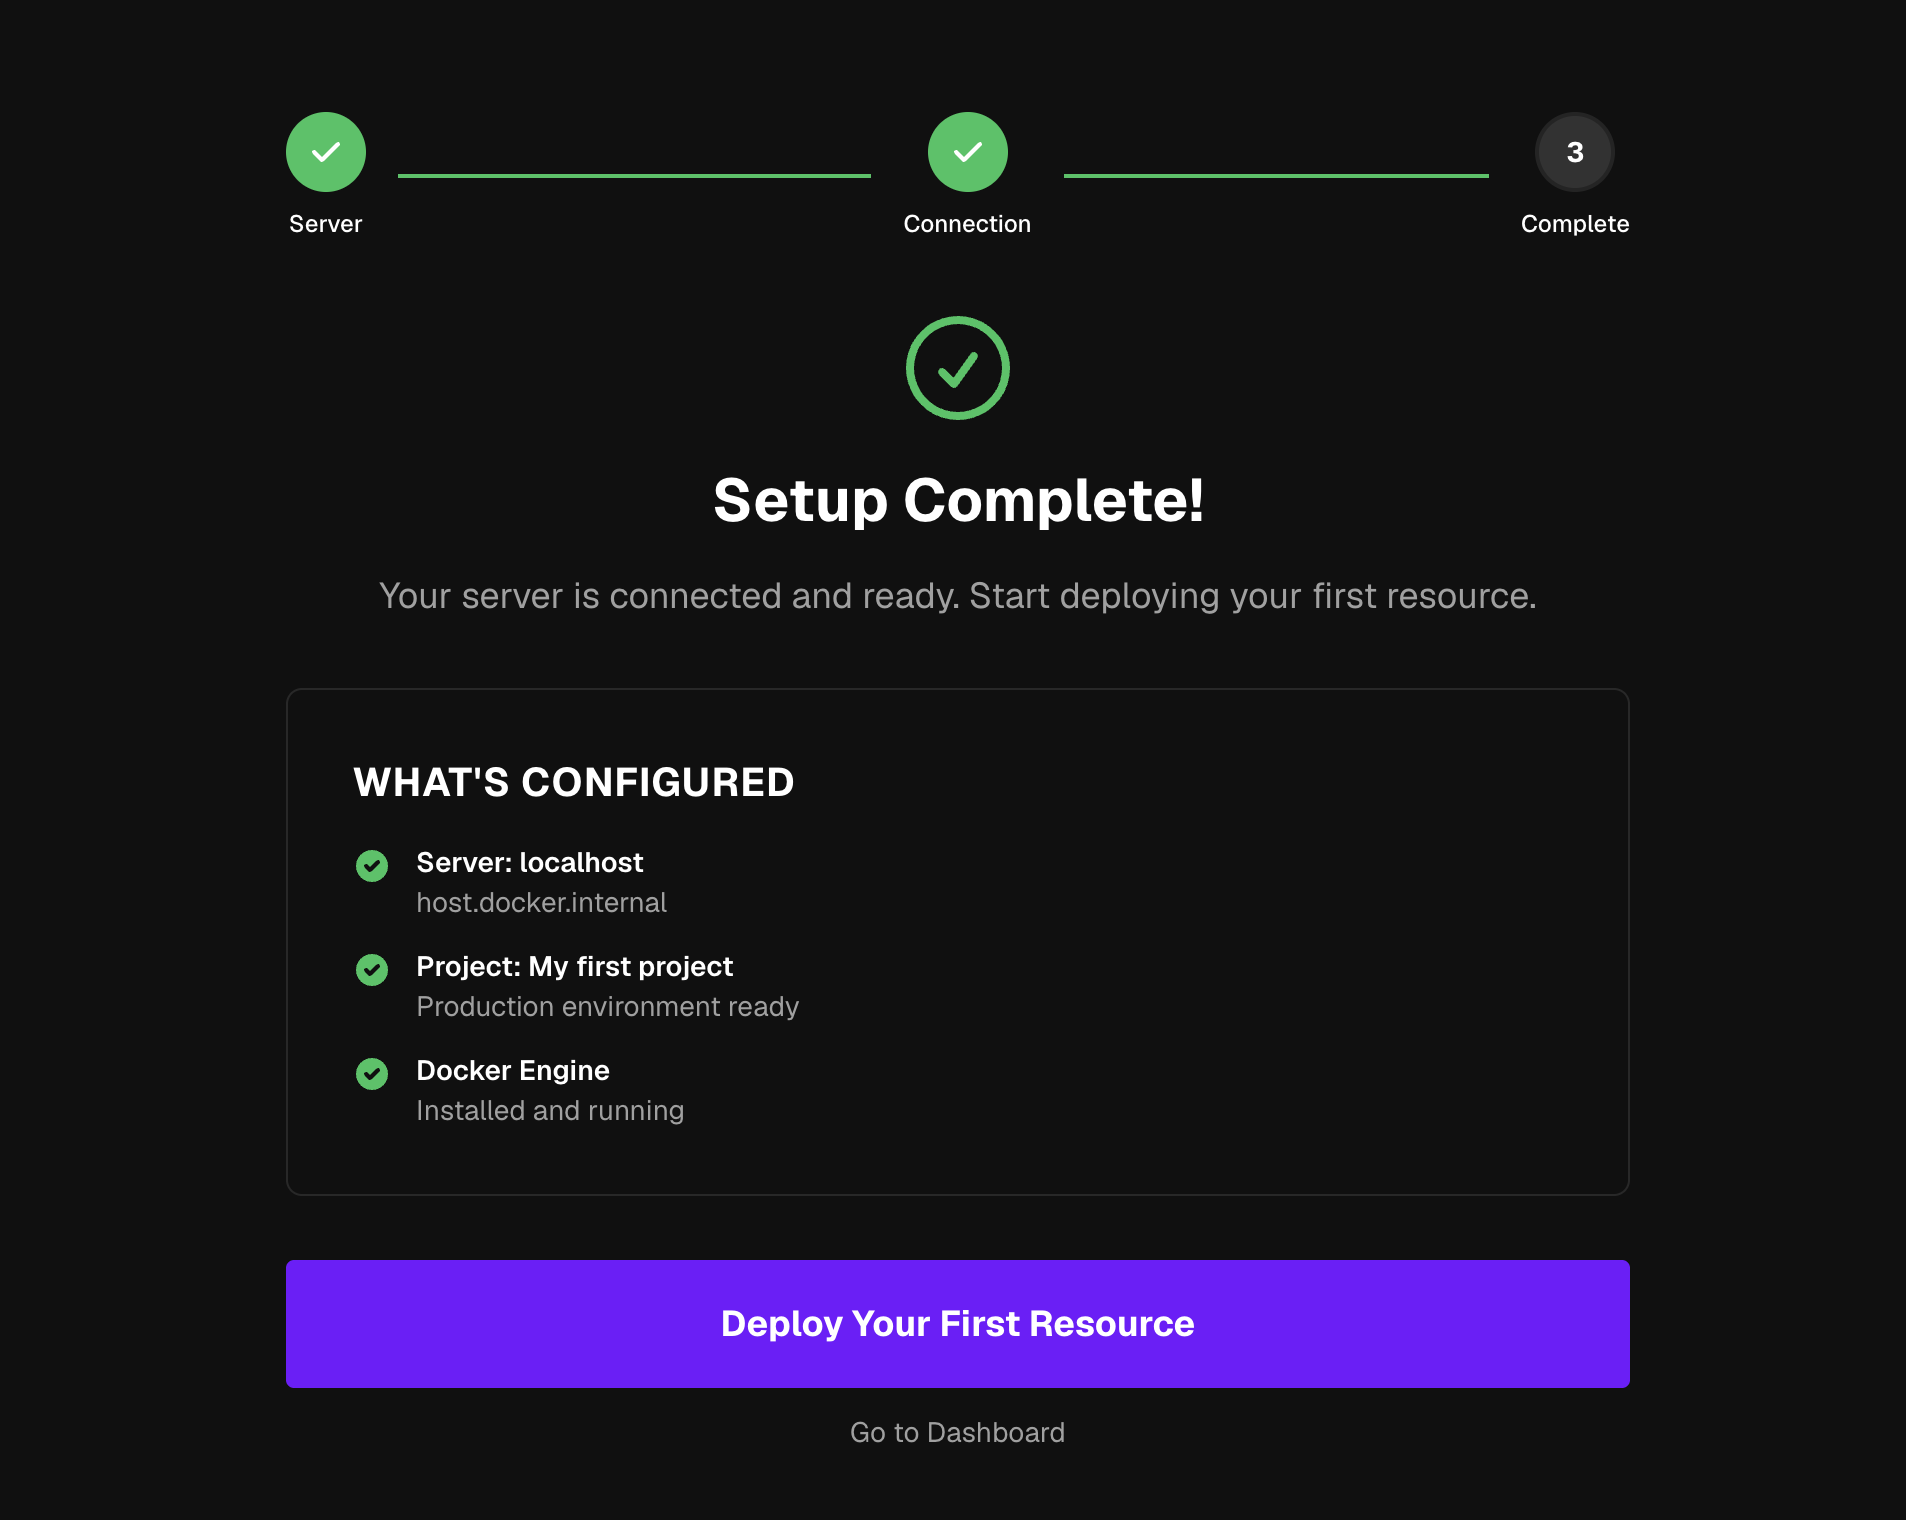
Finish setup
On Step 3 — Complete, Coolify confirms the server, project, and Docker engine are ready. Click Deploy Your First Resource to start creating apps, or Go to Dashboard.
Next steps
- See the Coolify docs for application templates, environment management, backups, and resource limits.
- For ongoing VM management (Power, Scale, Reinstall), see Cloud Compute.
- To attach a custom domain, see DNS management.