Create and manage a Virtual Private Cloud network
Last updated: May 26, 2026
A Virtual Private Cloud (VPC) is a private, isolated network in American Cloud where you control the CIDR block, divide it into tiers (subnets), reserve public IPs, and attach ACLs. This article walks through creating a VPC, adding tiers, and managing public IPs from the new portal.
Related topics live in their own articles:
Create a VPC
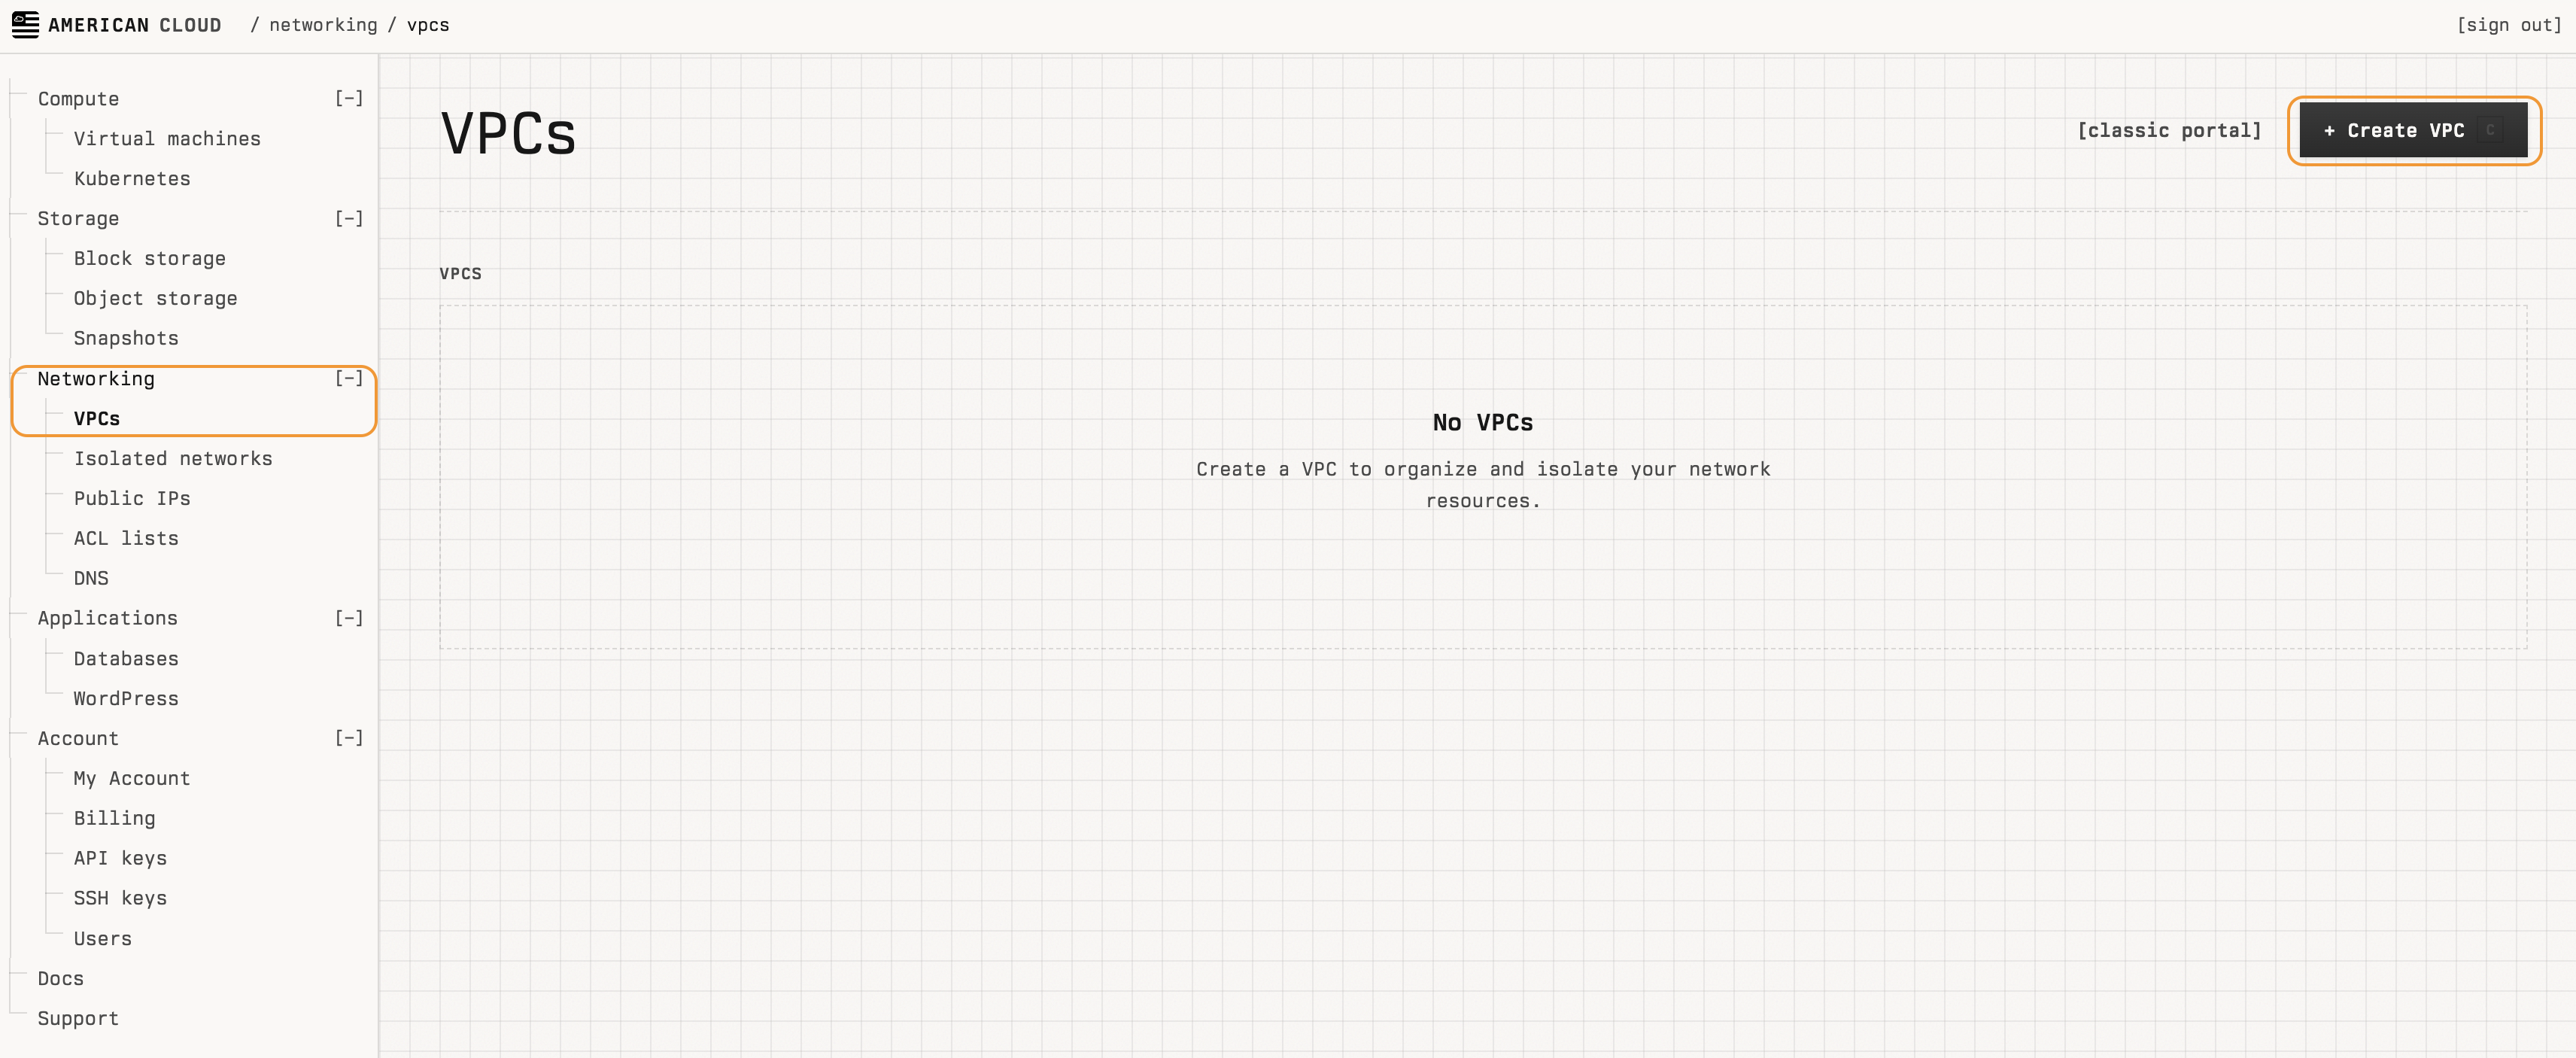
- In the left navigation, under Networking, select VPCs.
- In the top right of the VPCs page, click + Create VPC.
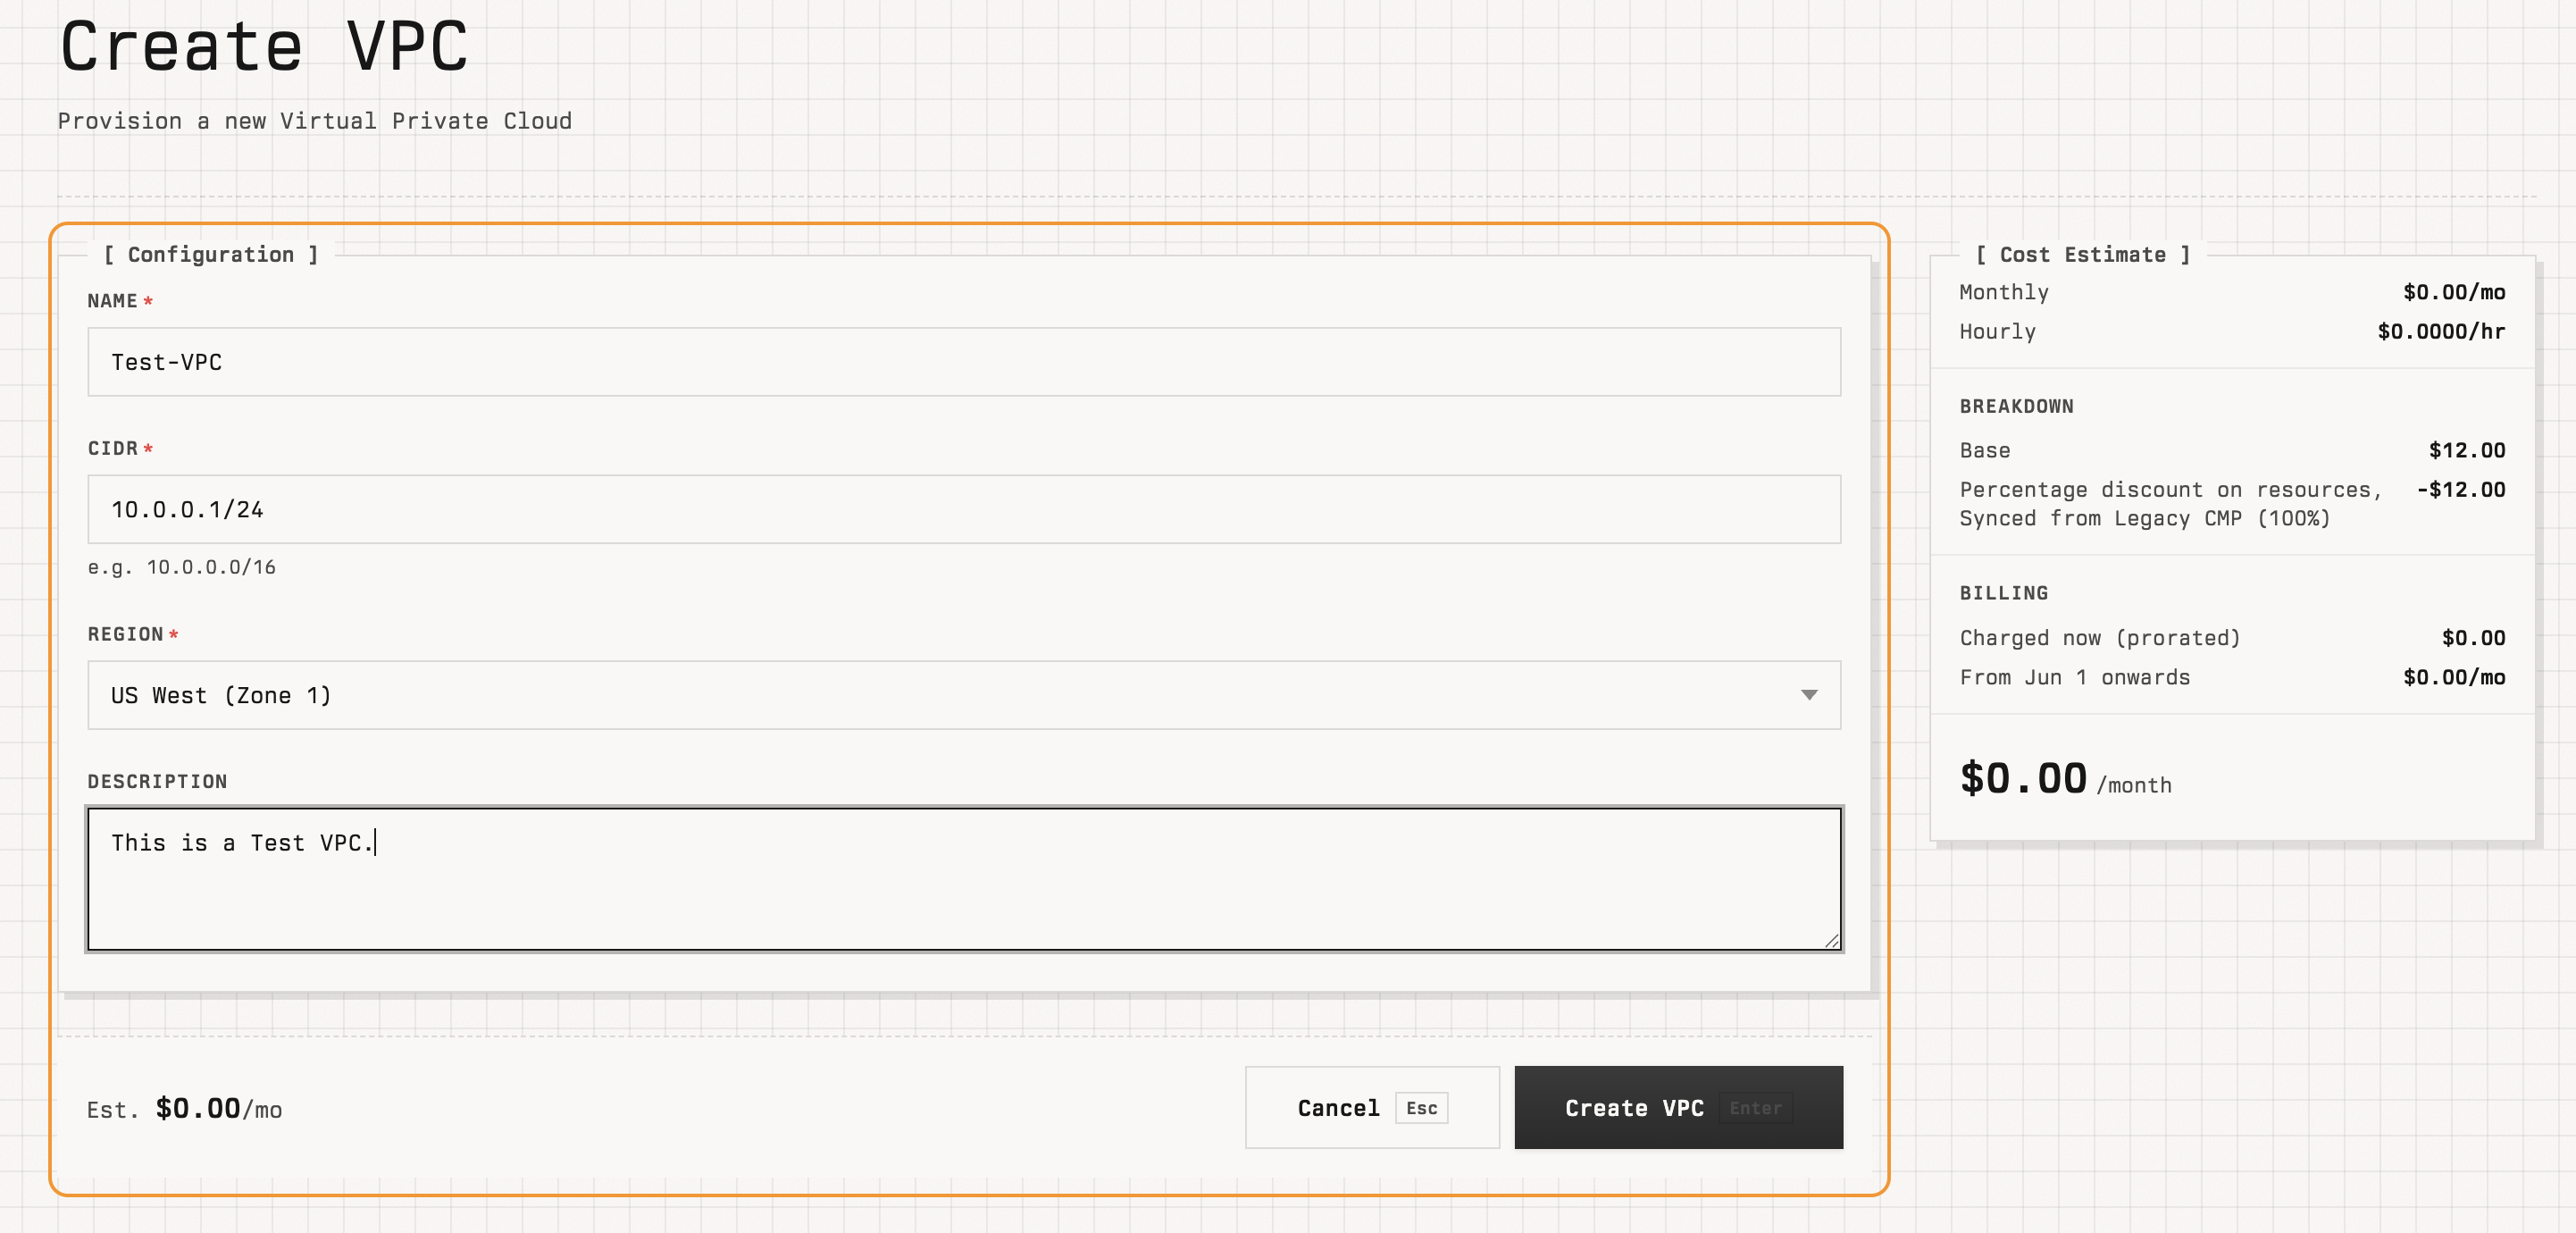
- On the Create VPC page, fill in the Configuration section:
- Name — a unique name (for example,
Test-VPC). - CIDR — the VPC's IP range (for example,
10.0.0.0/16). - Region — the region the VPC lives in.
- Description — optional human-readable note.
- Name — a unique name (for example,
- Review the cost estimate on the right and click Create VPC.
The new VPC appears in the VPCs list with status ENABLED.

Note: A VPC does not delete itself. To stop billing for a VPC, delete it from its detail page.
Add a tier
Tiers are subnets inside the VPC. Each tier has its own gateway, netmask, and ACL.
- From the VPCs list, click a VPC to open its detail page.
- In the Tiers section, click + Add Tier.
- In the Add Tier dialog, fill in:
- Name — a tier name (for example,
Web server). - Description — optional.
- Gateway — the tier's default gateway IP (for example,
10.0.0.1). - Netmask — the tier's subnet mask (for example,
255.255.255.0). - ACL list — pick an existing ACL (
default_allow,default_deny, or a custom list). See Access control lists (ACLs) for creating custom ACLs.
- Name — a tier name (for example,
- Click Add Tier.
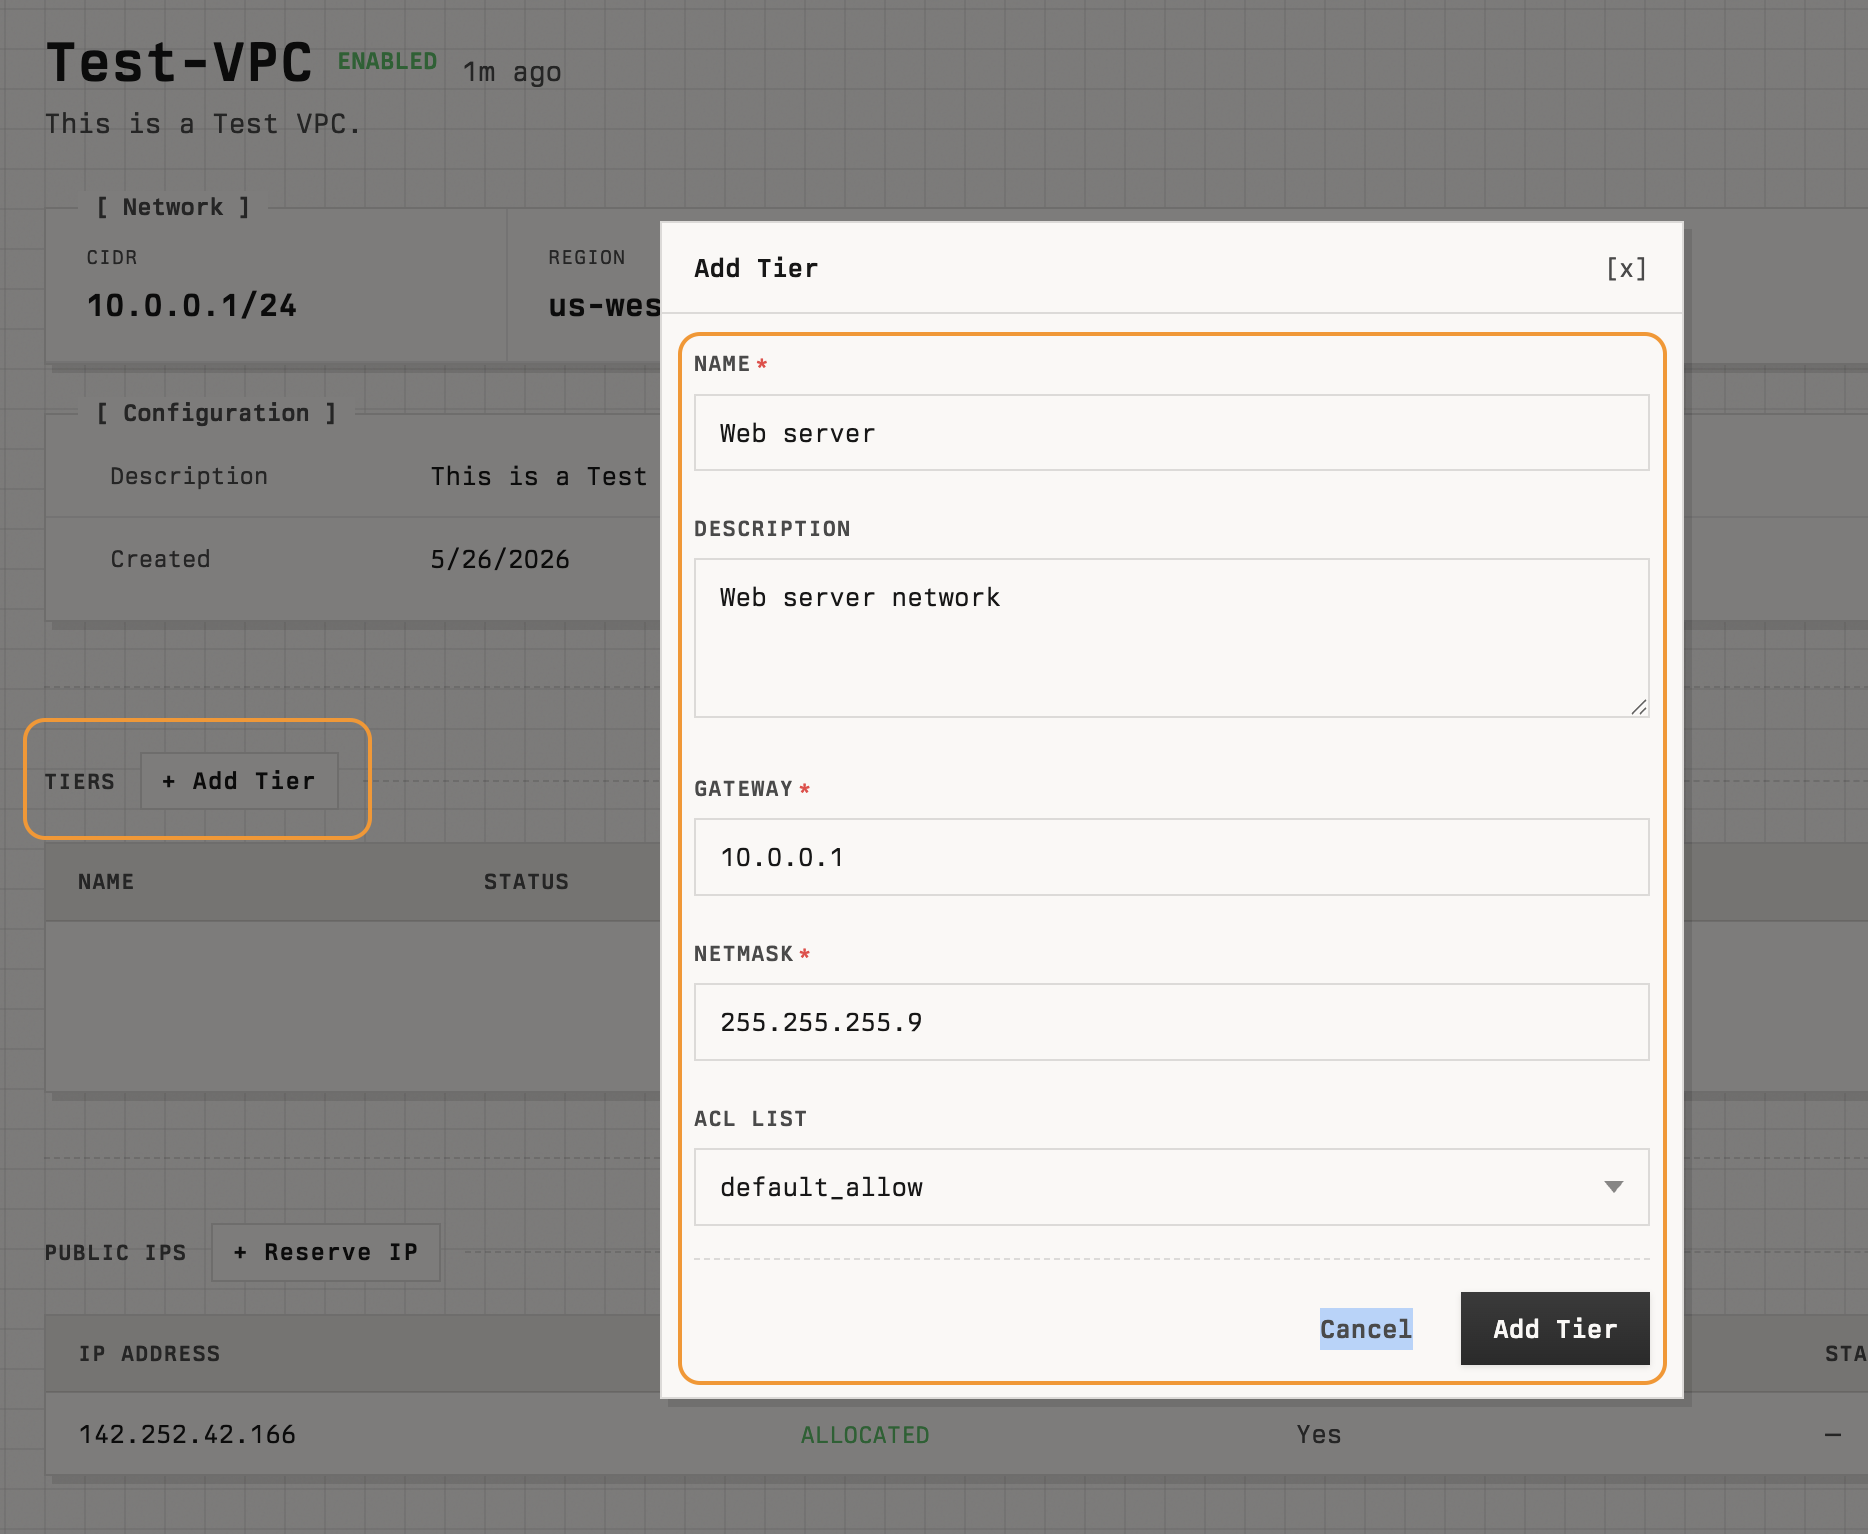
The new tier appears in the Tiers section once provisioning completes.
Manage a tier
Click a tier in the Tiers section to open its detail page. The page shows two panels and four actions in the top right.
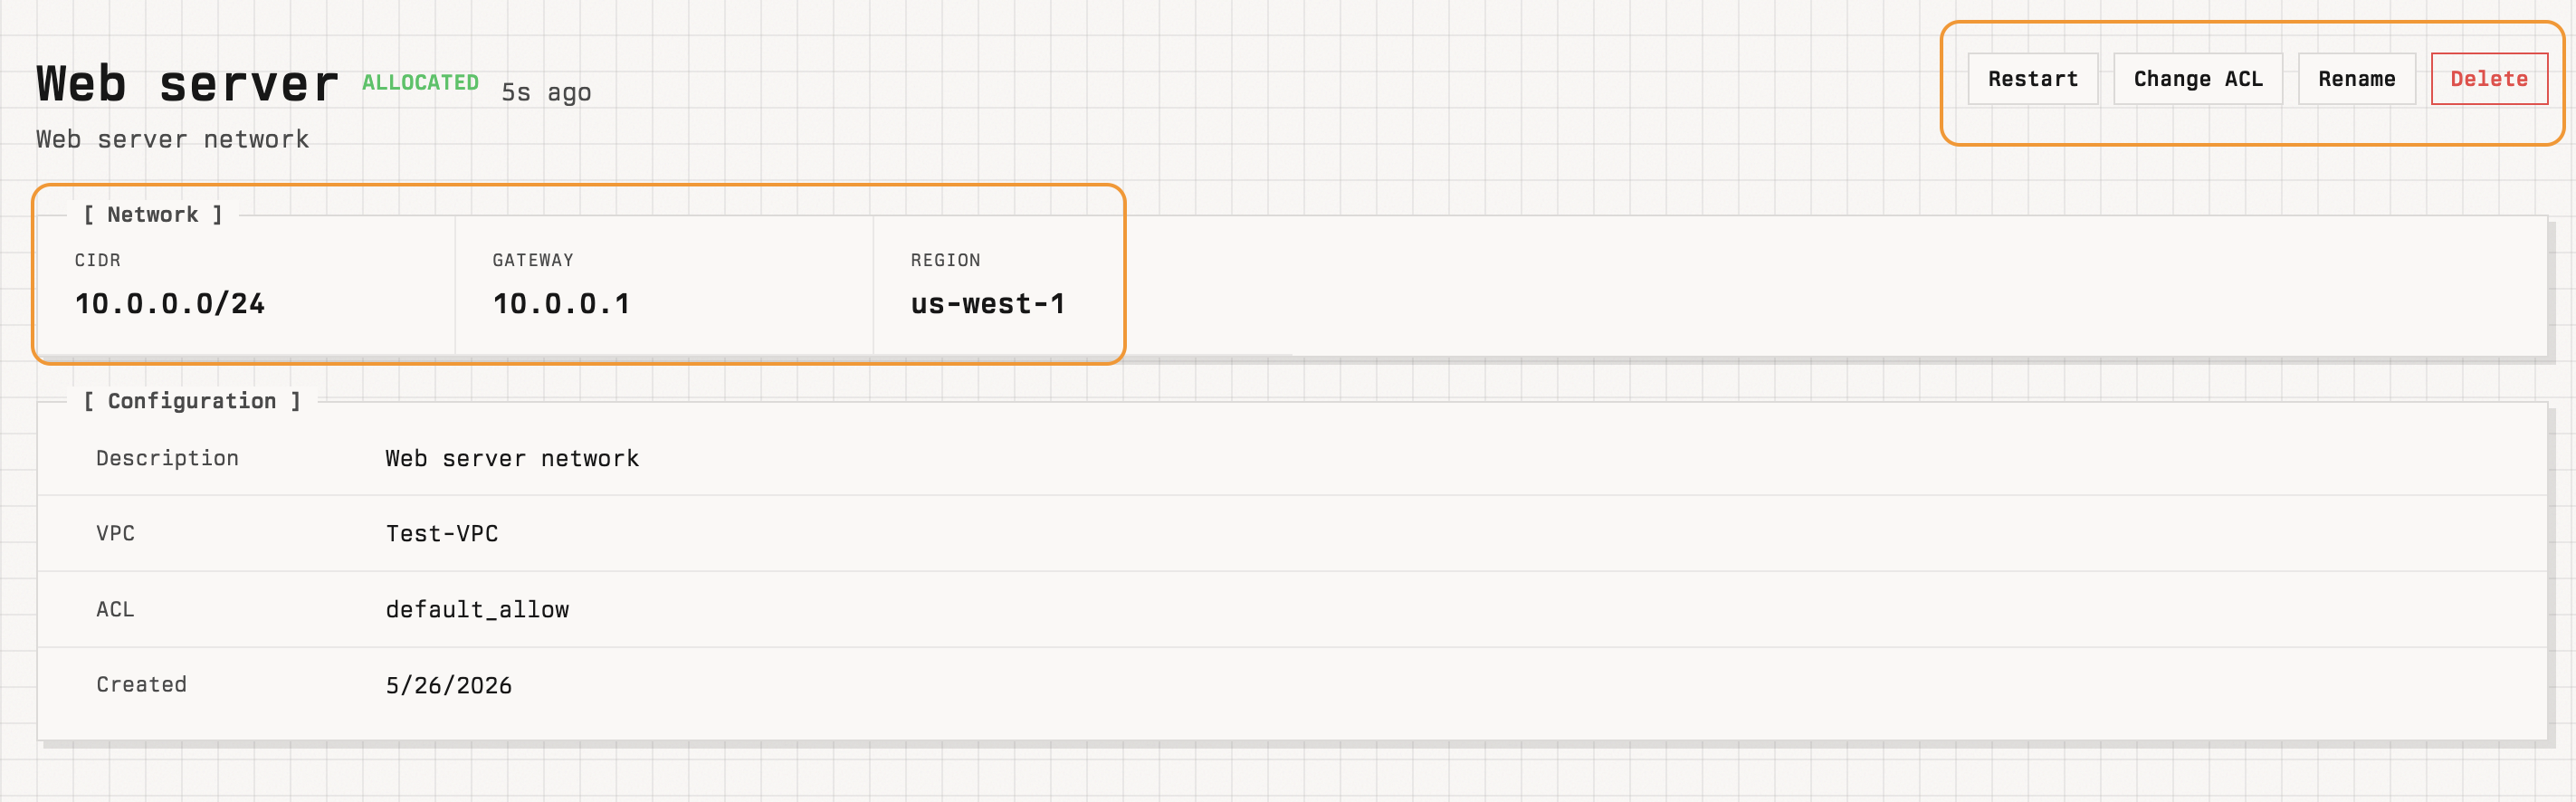
- Network — CIDR, gateway, and region.
- Configuration — description, parent VPC, ACL, and creation time.
- Restart — restart the tier's virtual router (briefly disrupts traffic on this tier).
- Change ACL — swap the ACL applied to the tier.
- Rename — change the tier's name.
- Delete — remove the tier. Detach any VMs first.
To attach a VM to a tier, select the tier as the Network when creating a VM.
Public IPs
A VPC includes one source-NAT public IP by default. Reserve additional public IPs from the Public IPs section on the VPC detail page.

Each row shows:
- IP address.
- State —
ALLOCATEDonce available. - Source NAT —
Yesfor the VPC's default source-NAT IP; outbound traffic from tier VMs leaves through this IP. - Static NAT — VM the IP is statically mapped to, if any.
- Created date.
Click an IP to open its detail page, where you can configure:
- Static NAT — 1:1 mapping between the public IP and a single VM.
- Port forwarding rules — forward specific public ports to a VM's private ports.
- Firewall rules — restrict inbound traffic on the public IP. See Firewall.
- Load balancer rules — distribute traffic across multiple VMs. See Load balancer.
To reserve a new public IP, click + Reserve IP at the top of the Public IPs section.